Introduction
Arcadia is a comprehensive torrent platform designed to be:
- Easy to setup - Get running quickly with minimal configuration
- Highly configurable - Customize the platform to your needs
- Content agnostic - Support for movies, TV shows, music, books, software, and more
- Well organized - Clean, intuitive interface for both users and administrators
The backend is built with Rust for speed and safety. The frontend is built with Typescript and VueJS, rendered client-side.
What Arcadia Supports
Arcadia supports a wide variety of content types including:
Movies
- Feature Film: Full-length films with rich metadata support.
- Short Film: Shorter cinematic works.
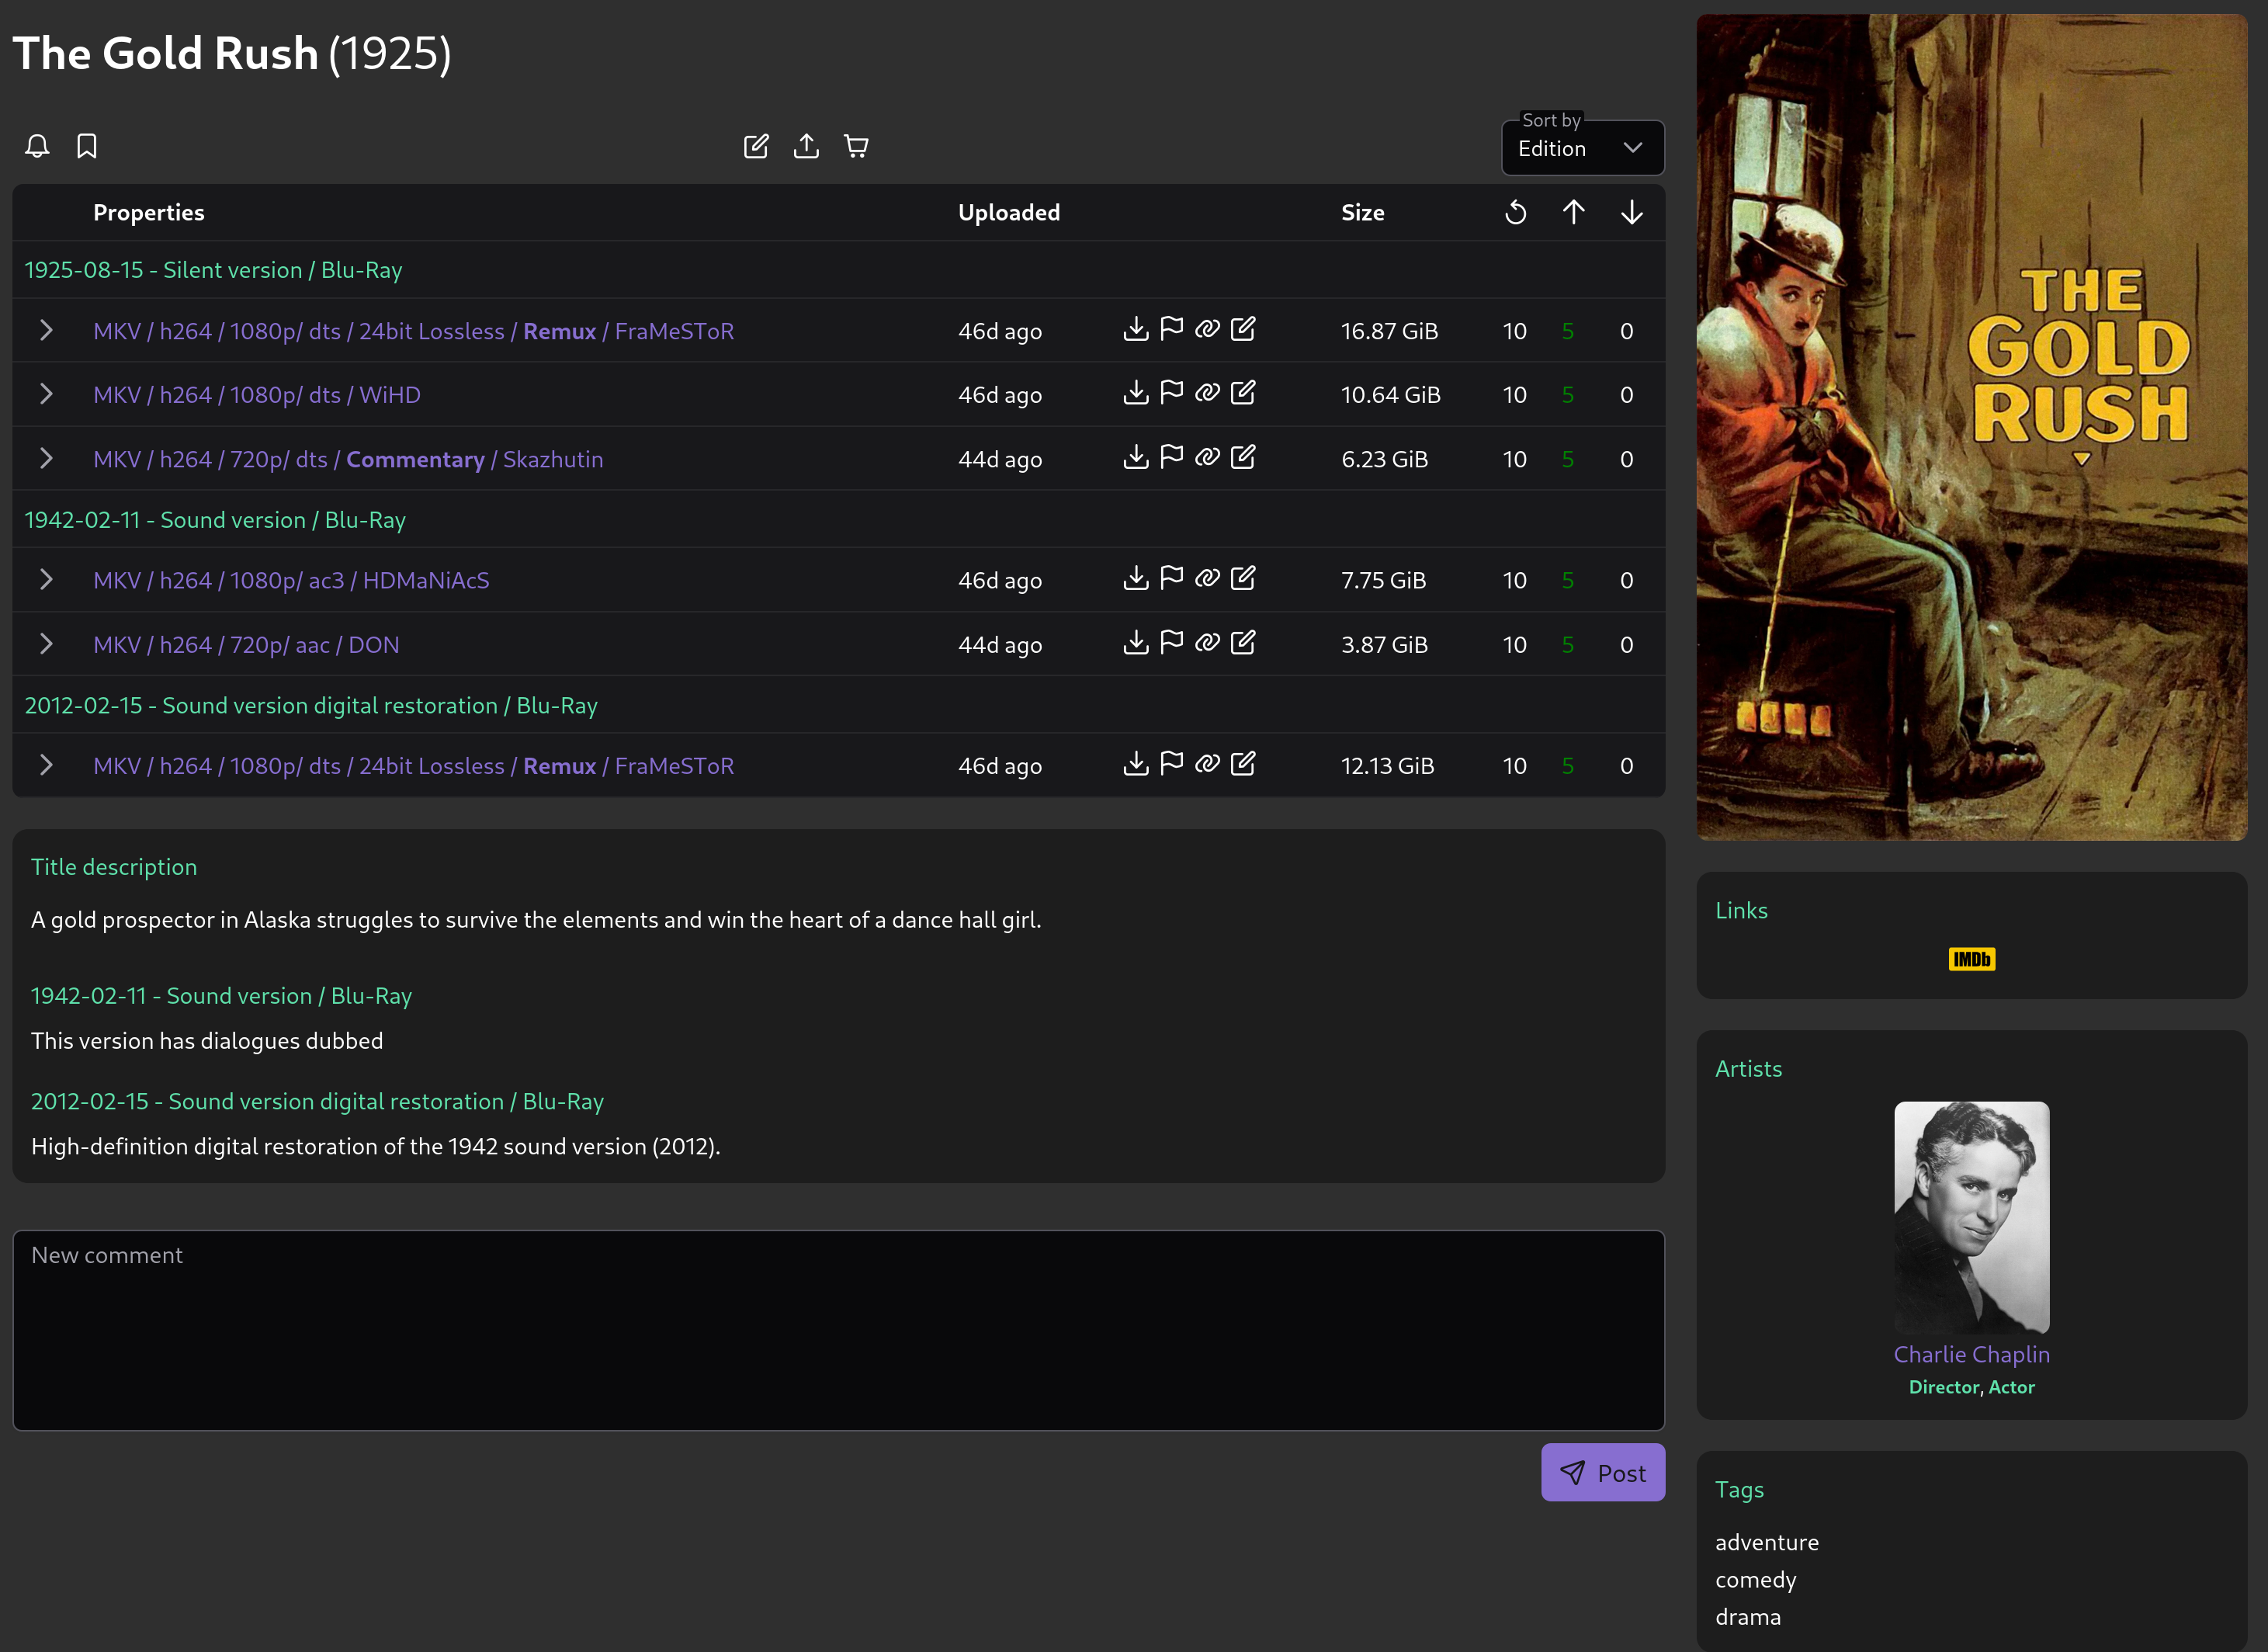
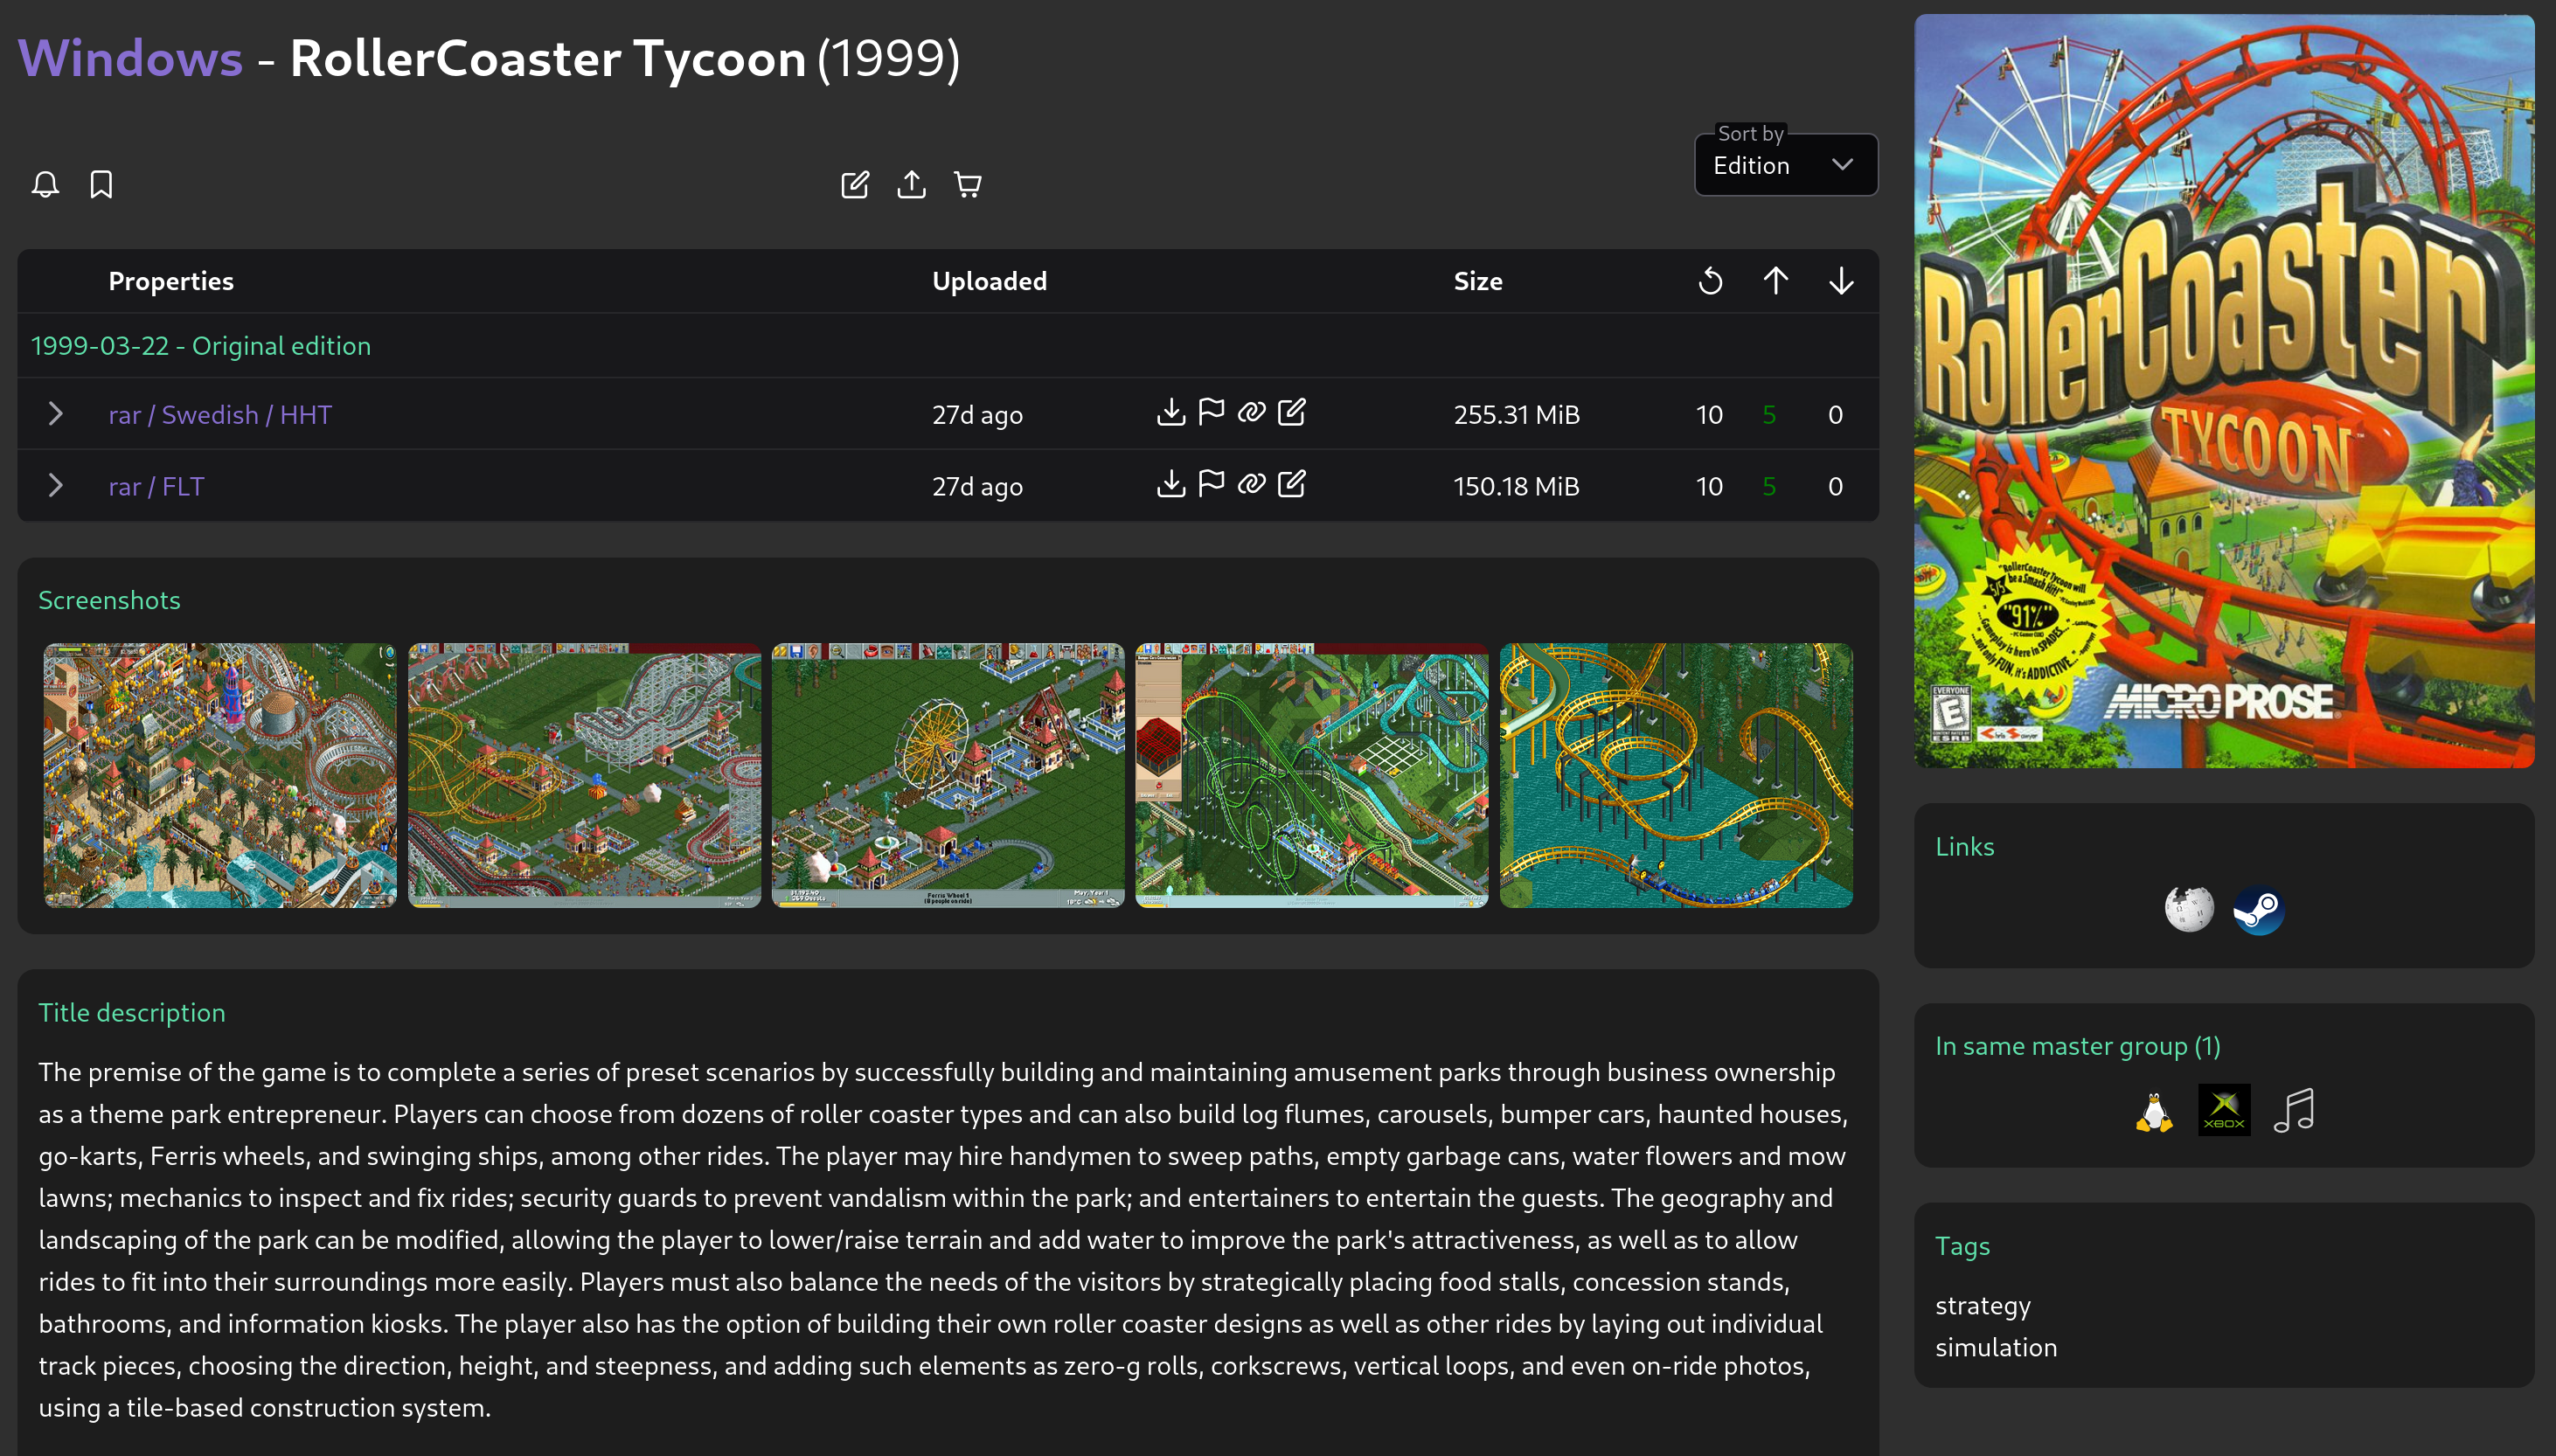
Movie entry
TV Shows
- Series and seasons with episode tracking capabilities.
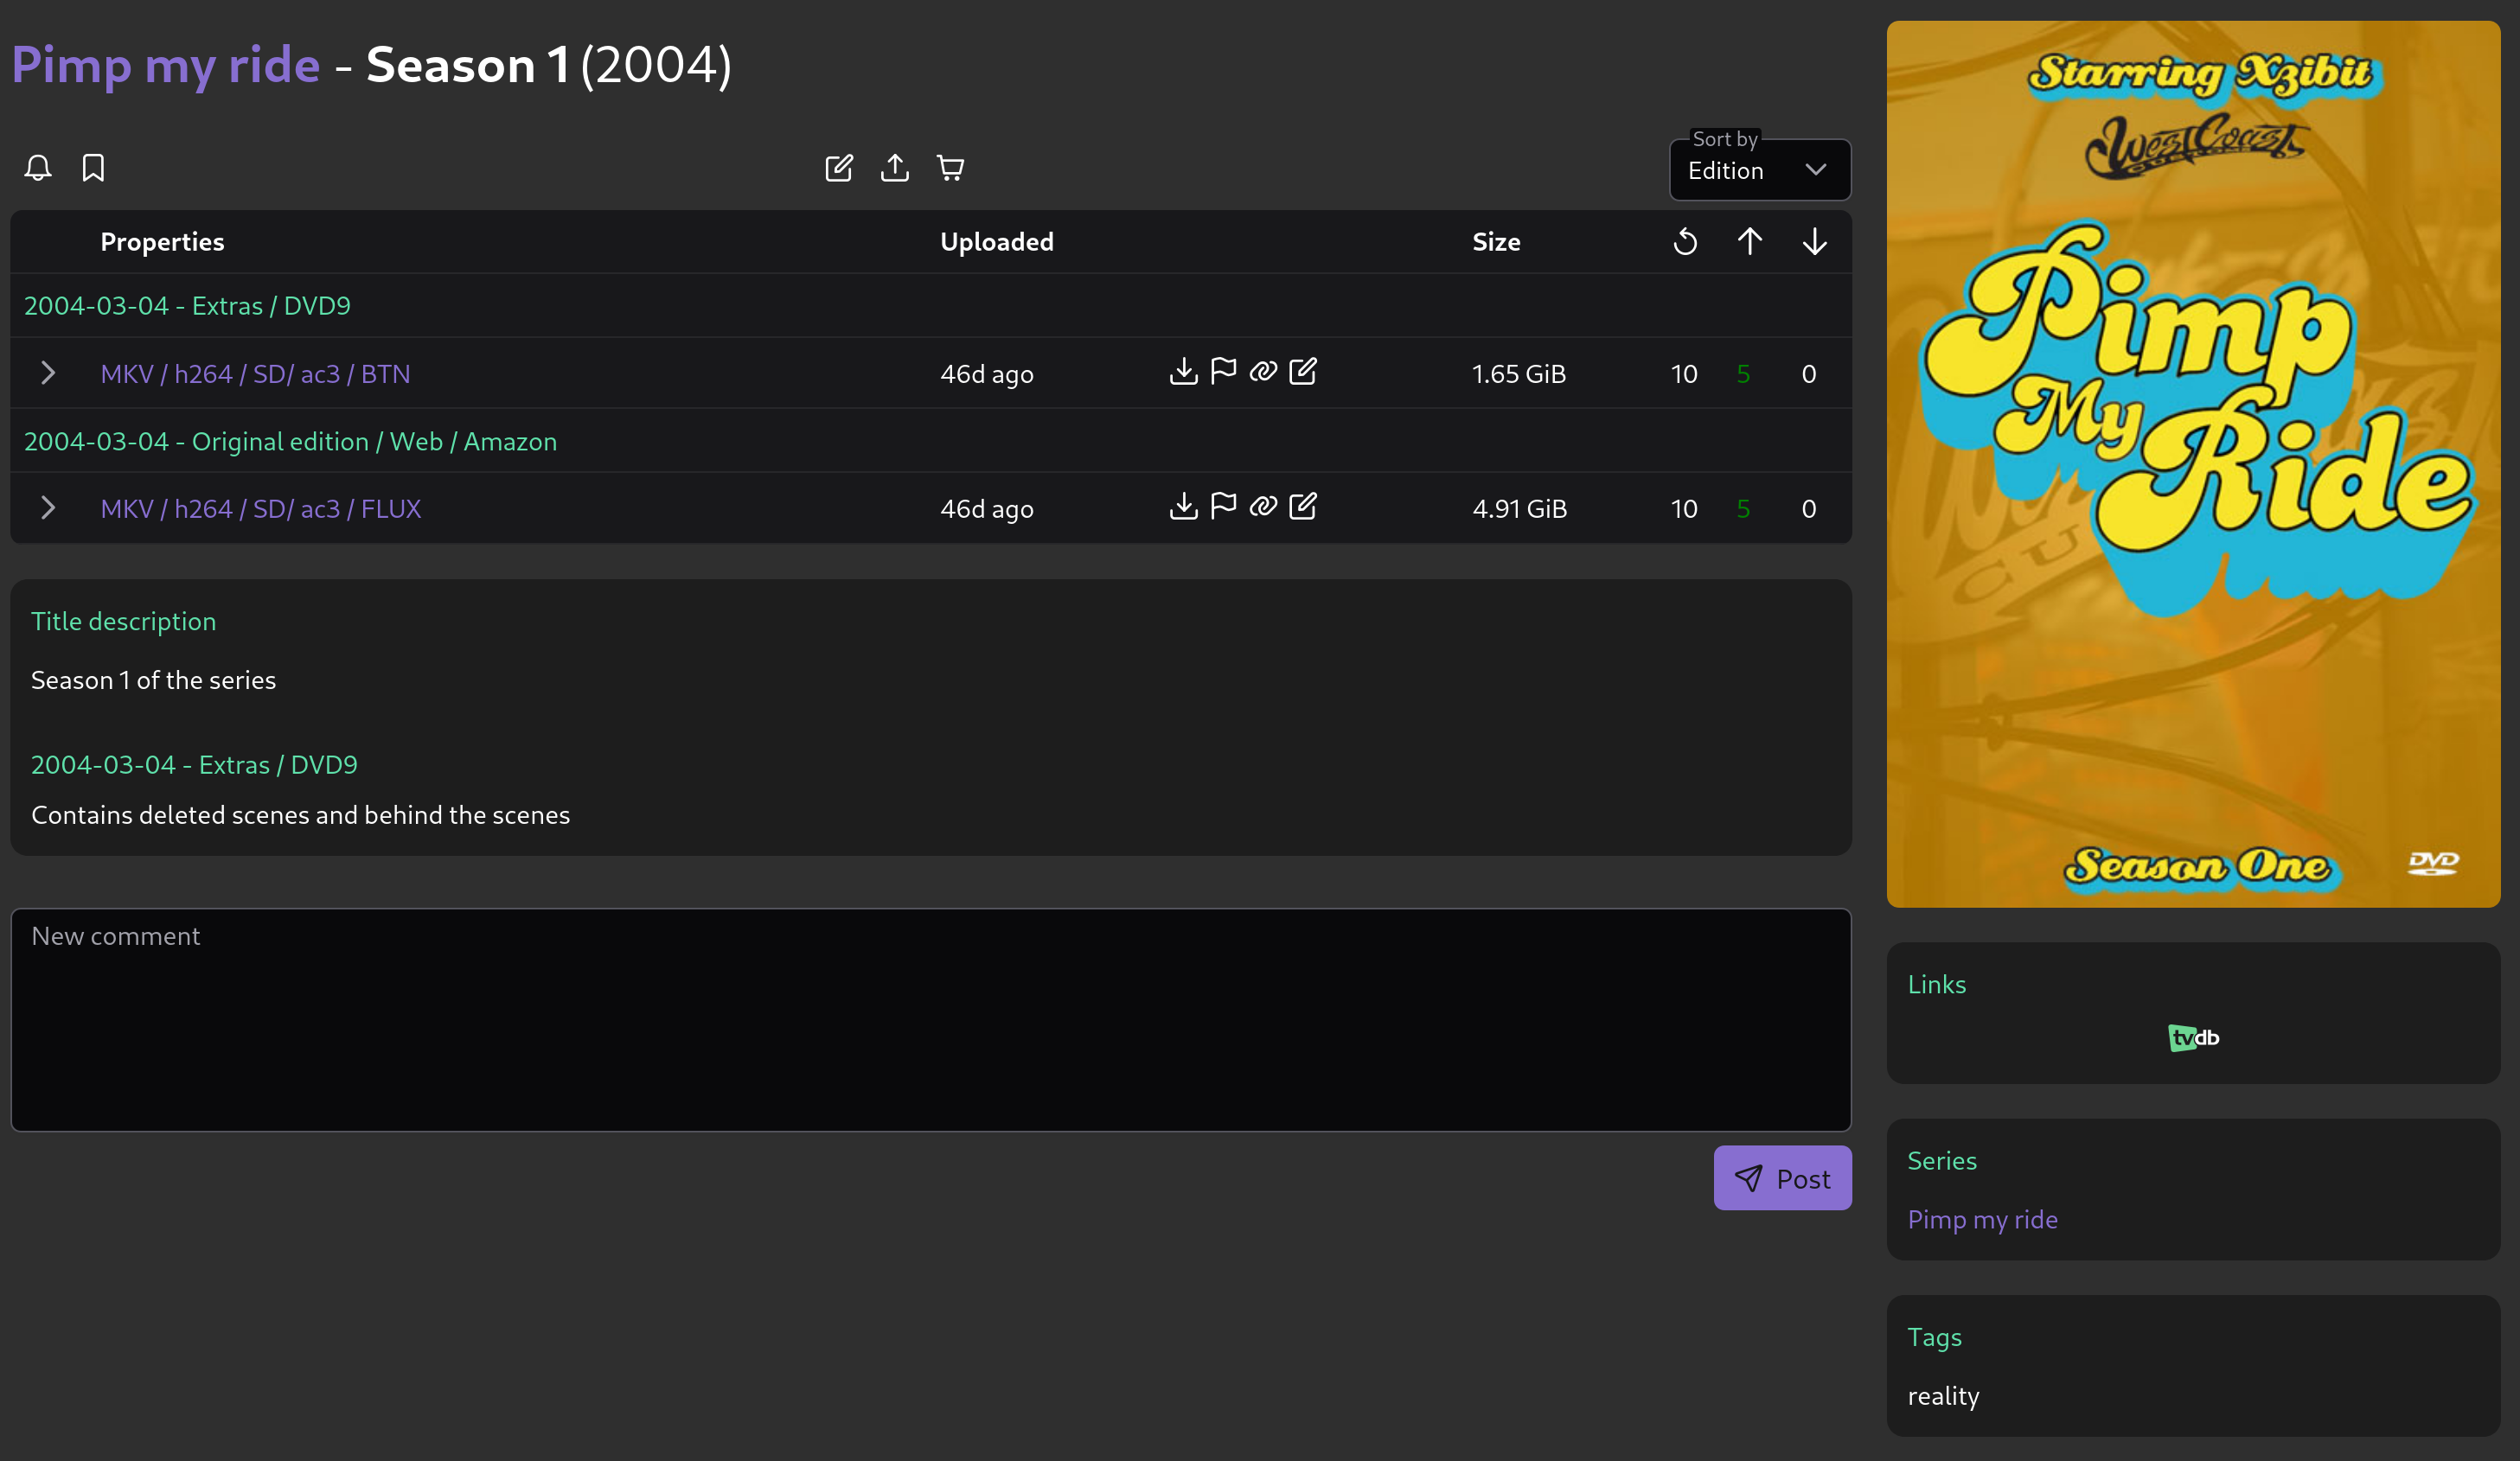
TV Show - Season entry
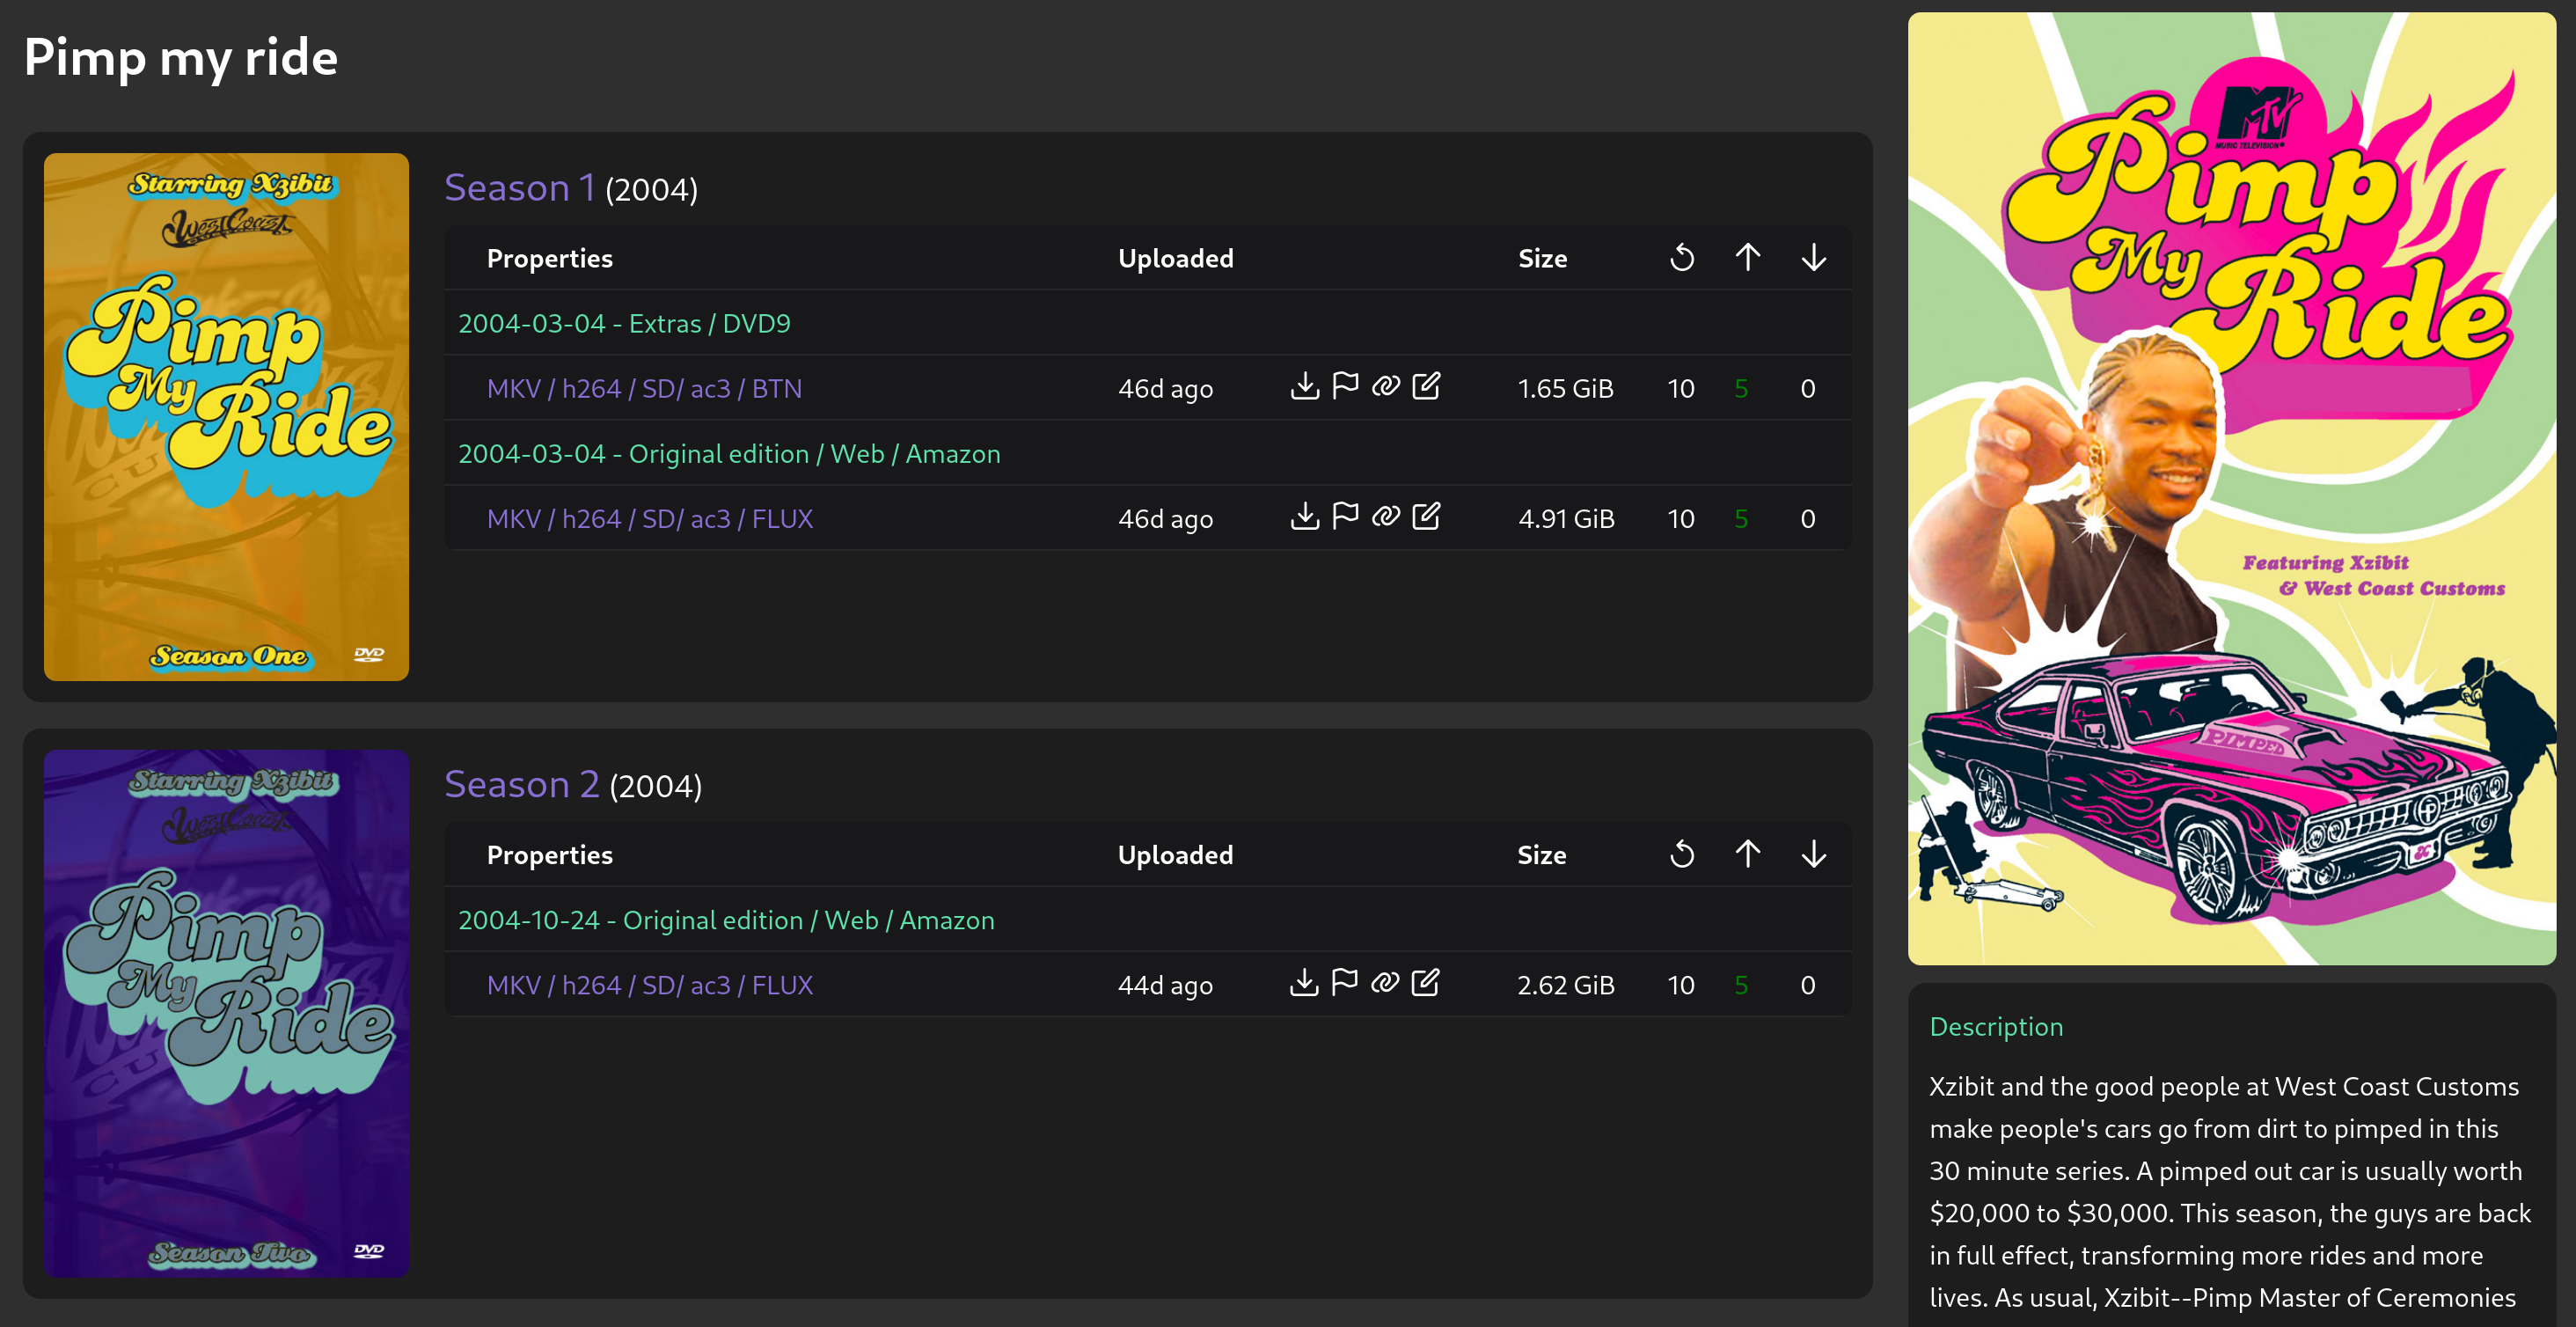
TV Show - Series view
Music
- Album: Includes “live album” as an “edition.”
- EP: Extended plays.
- Single: Individual tracks.
- Soundtrack: Music from movies, TV shows, or games.
- Anthology: Collections of works by an artist or group.
- Compilation: Curated collections of tracks.
- Remix: Reimagined versions of original tracks.
- Bootleg: Unofficial recordings.
- Mixtape: Curated playlists or unofficial releases.
- Concert Recording: Live performance recordings.
- DJ Mix: Continuous mixes by DJs.
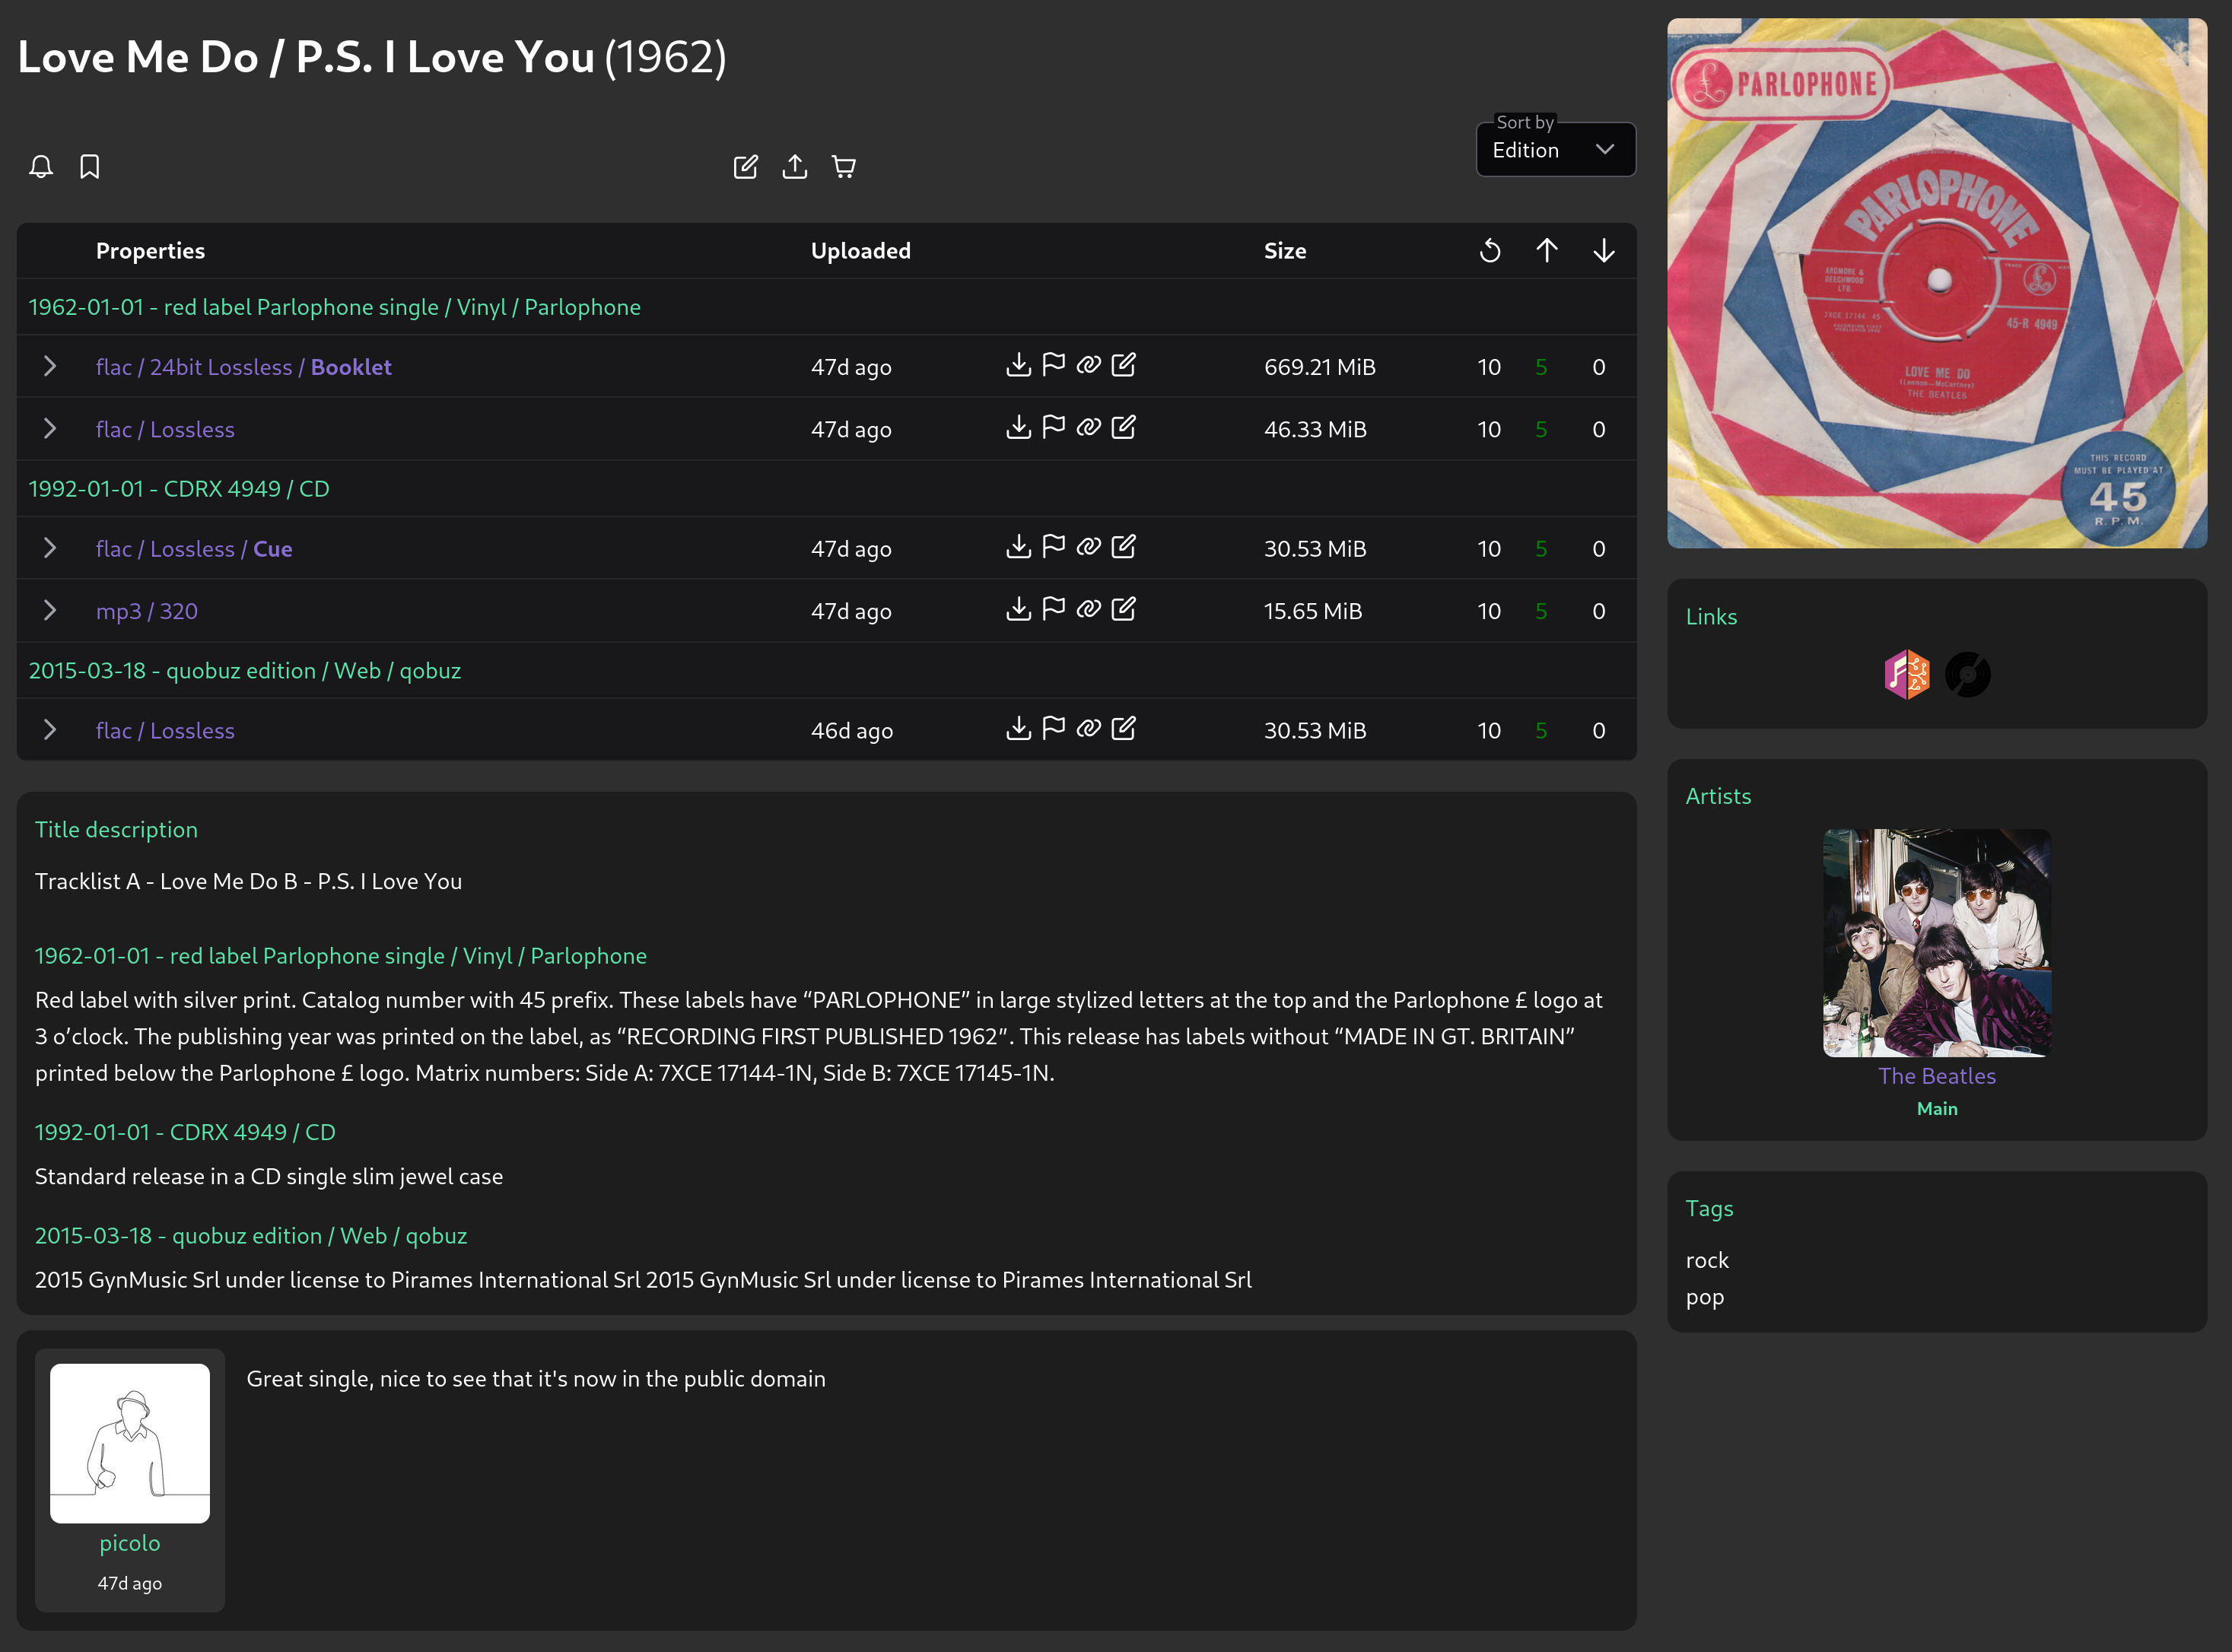
Music
Software
- Game: Video games of all genres.
- Program: Applications and utilities.
Software - Game
Written Documents
- Book: Includes hardcover, paperback, and digital formats.
- Illustrated: Includes mangas, comics, and visual novels.
- Periodical: Newspapers, magazines, and journals.
- Article: Studies, theses, essays, and research papers.
- Manual: Guides, music sheets, and instructional documents.
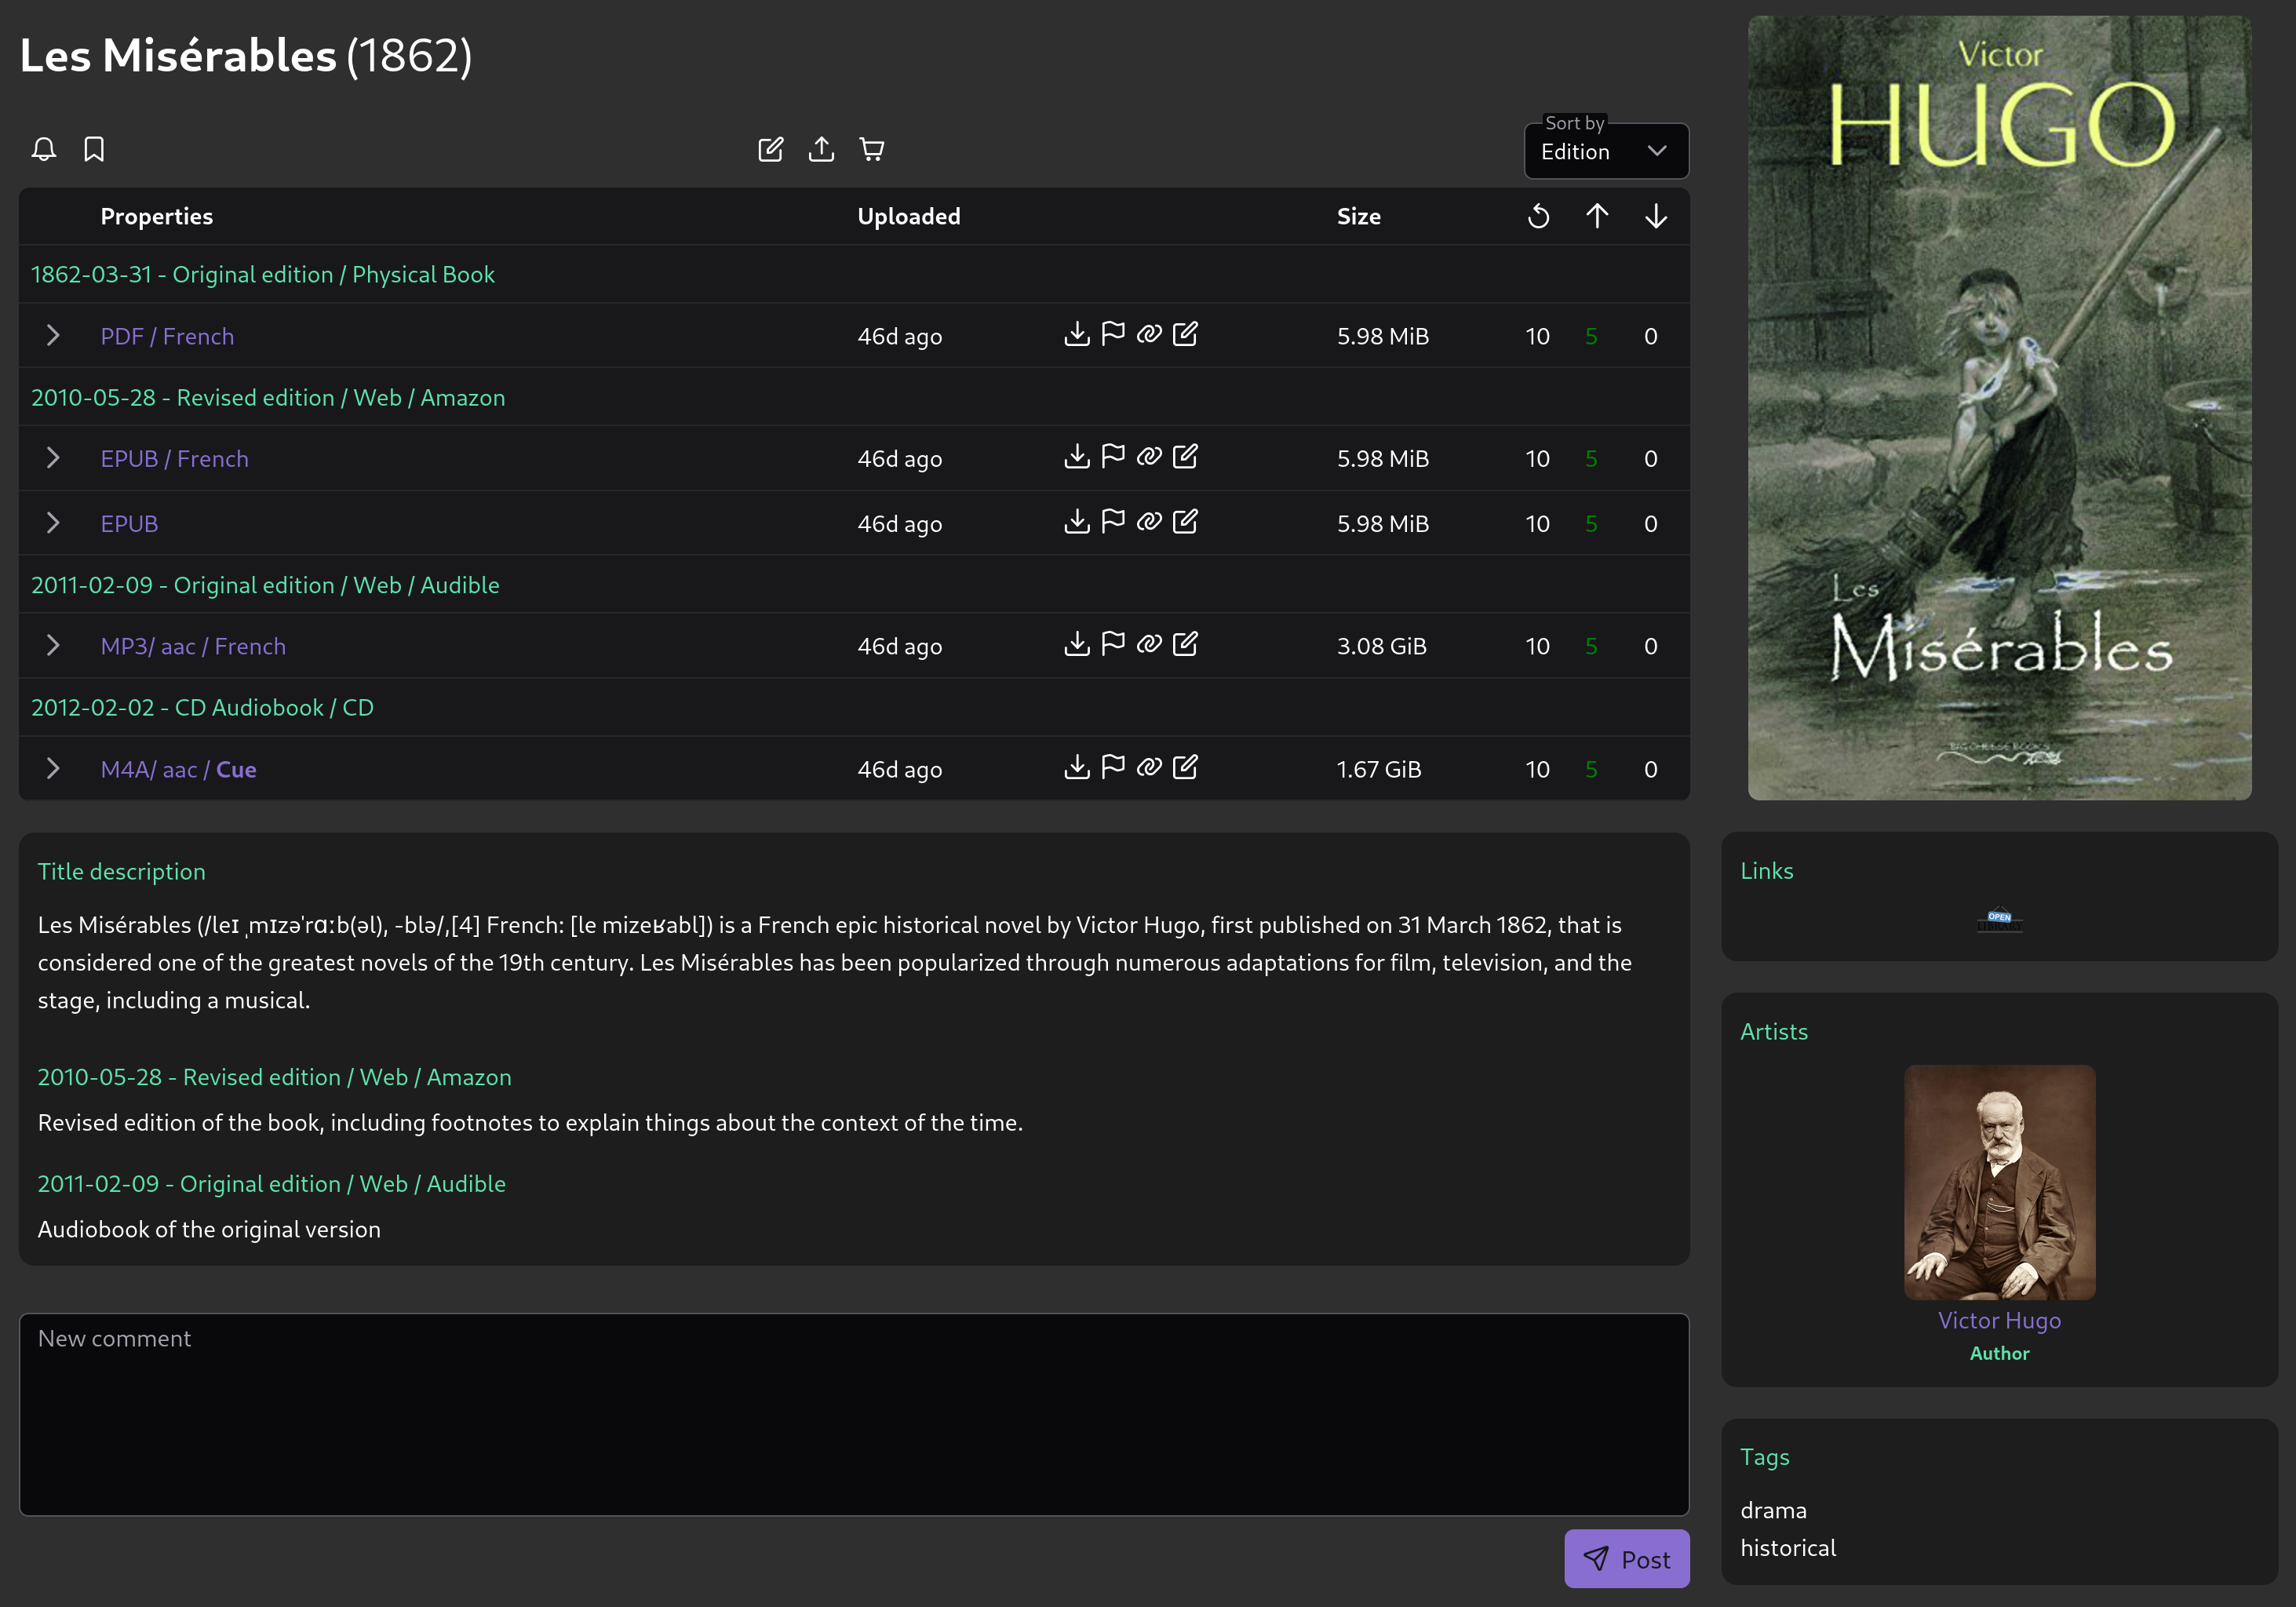
Book - Entry view
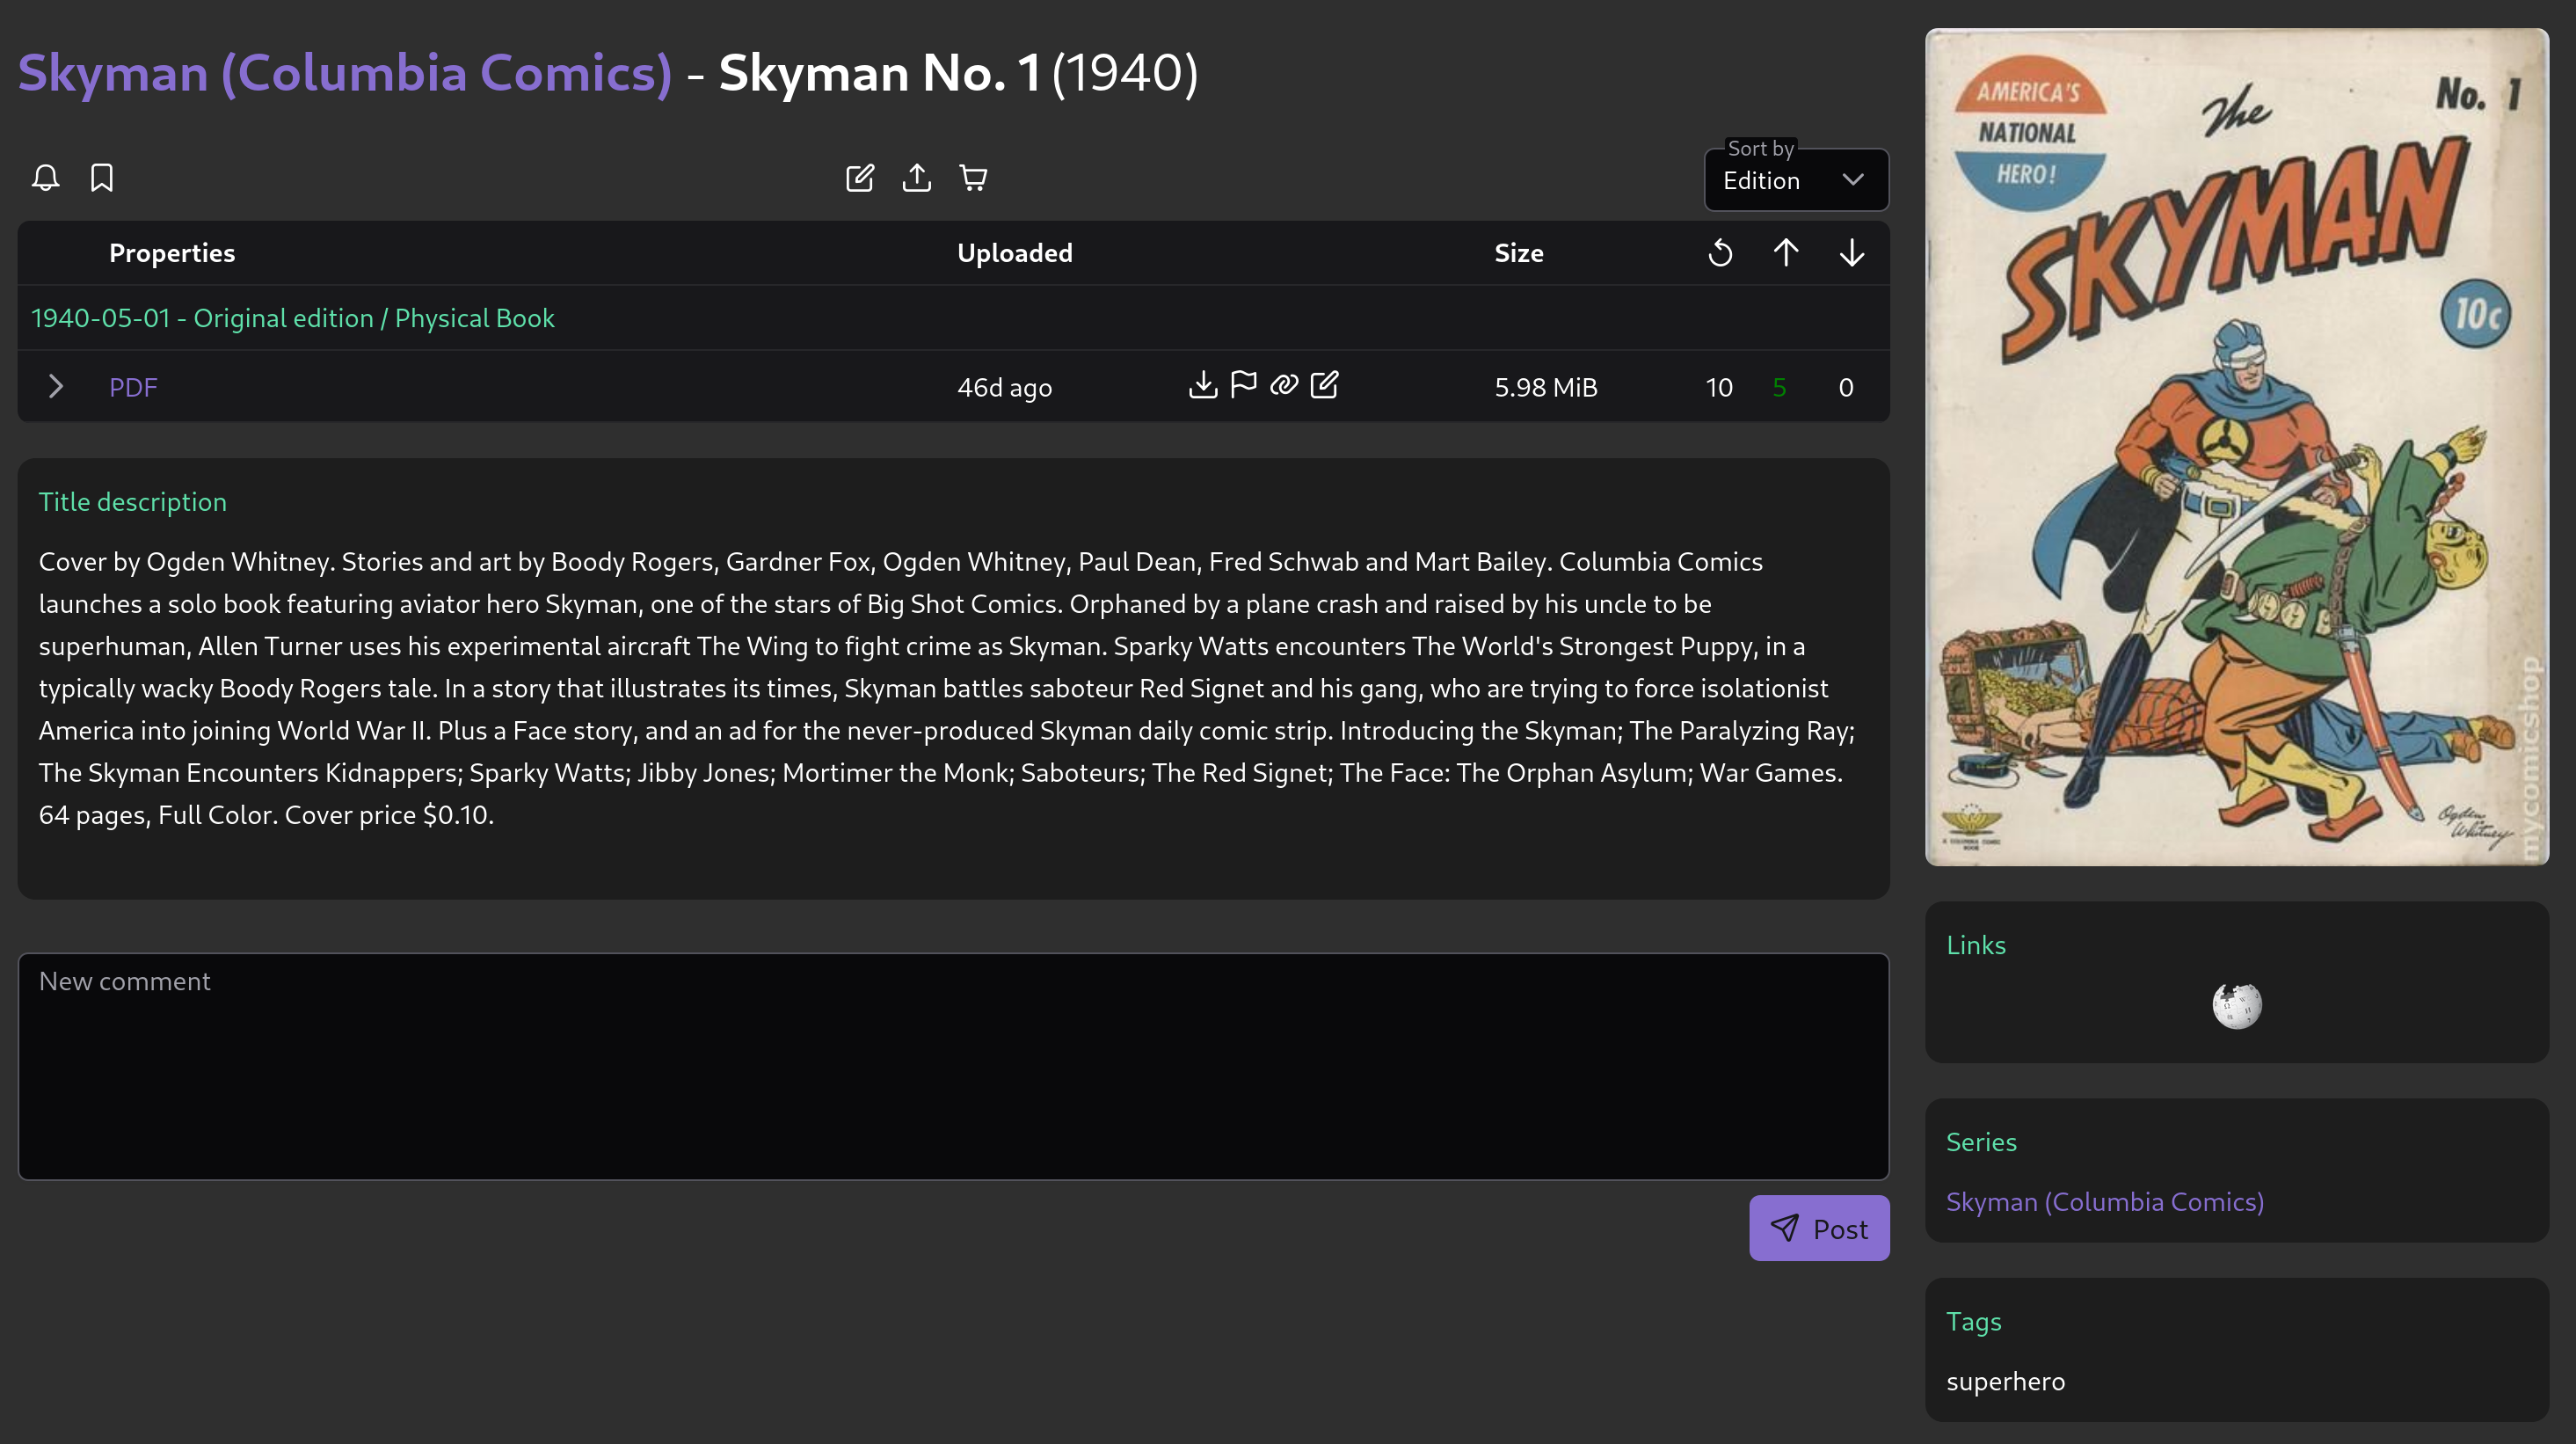
Book - Illustrated
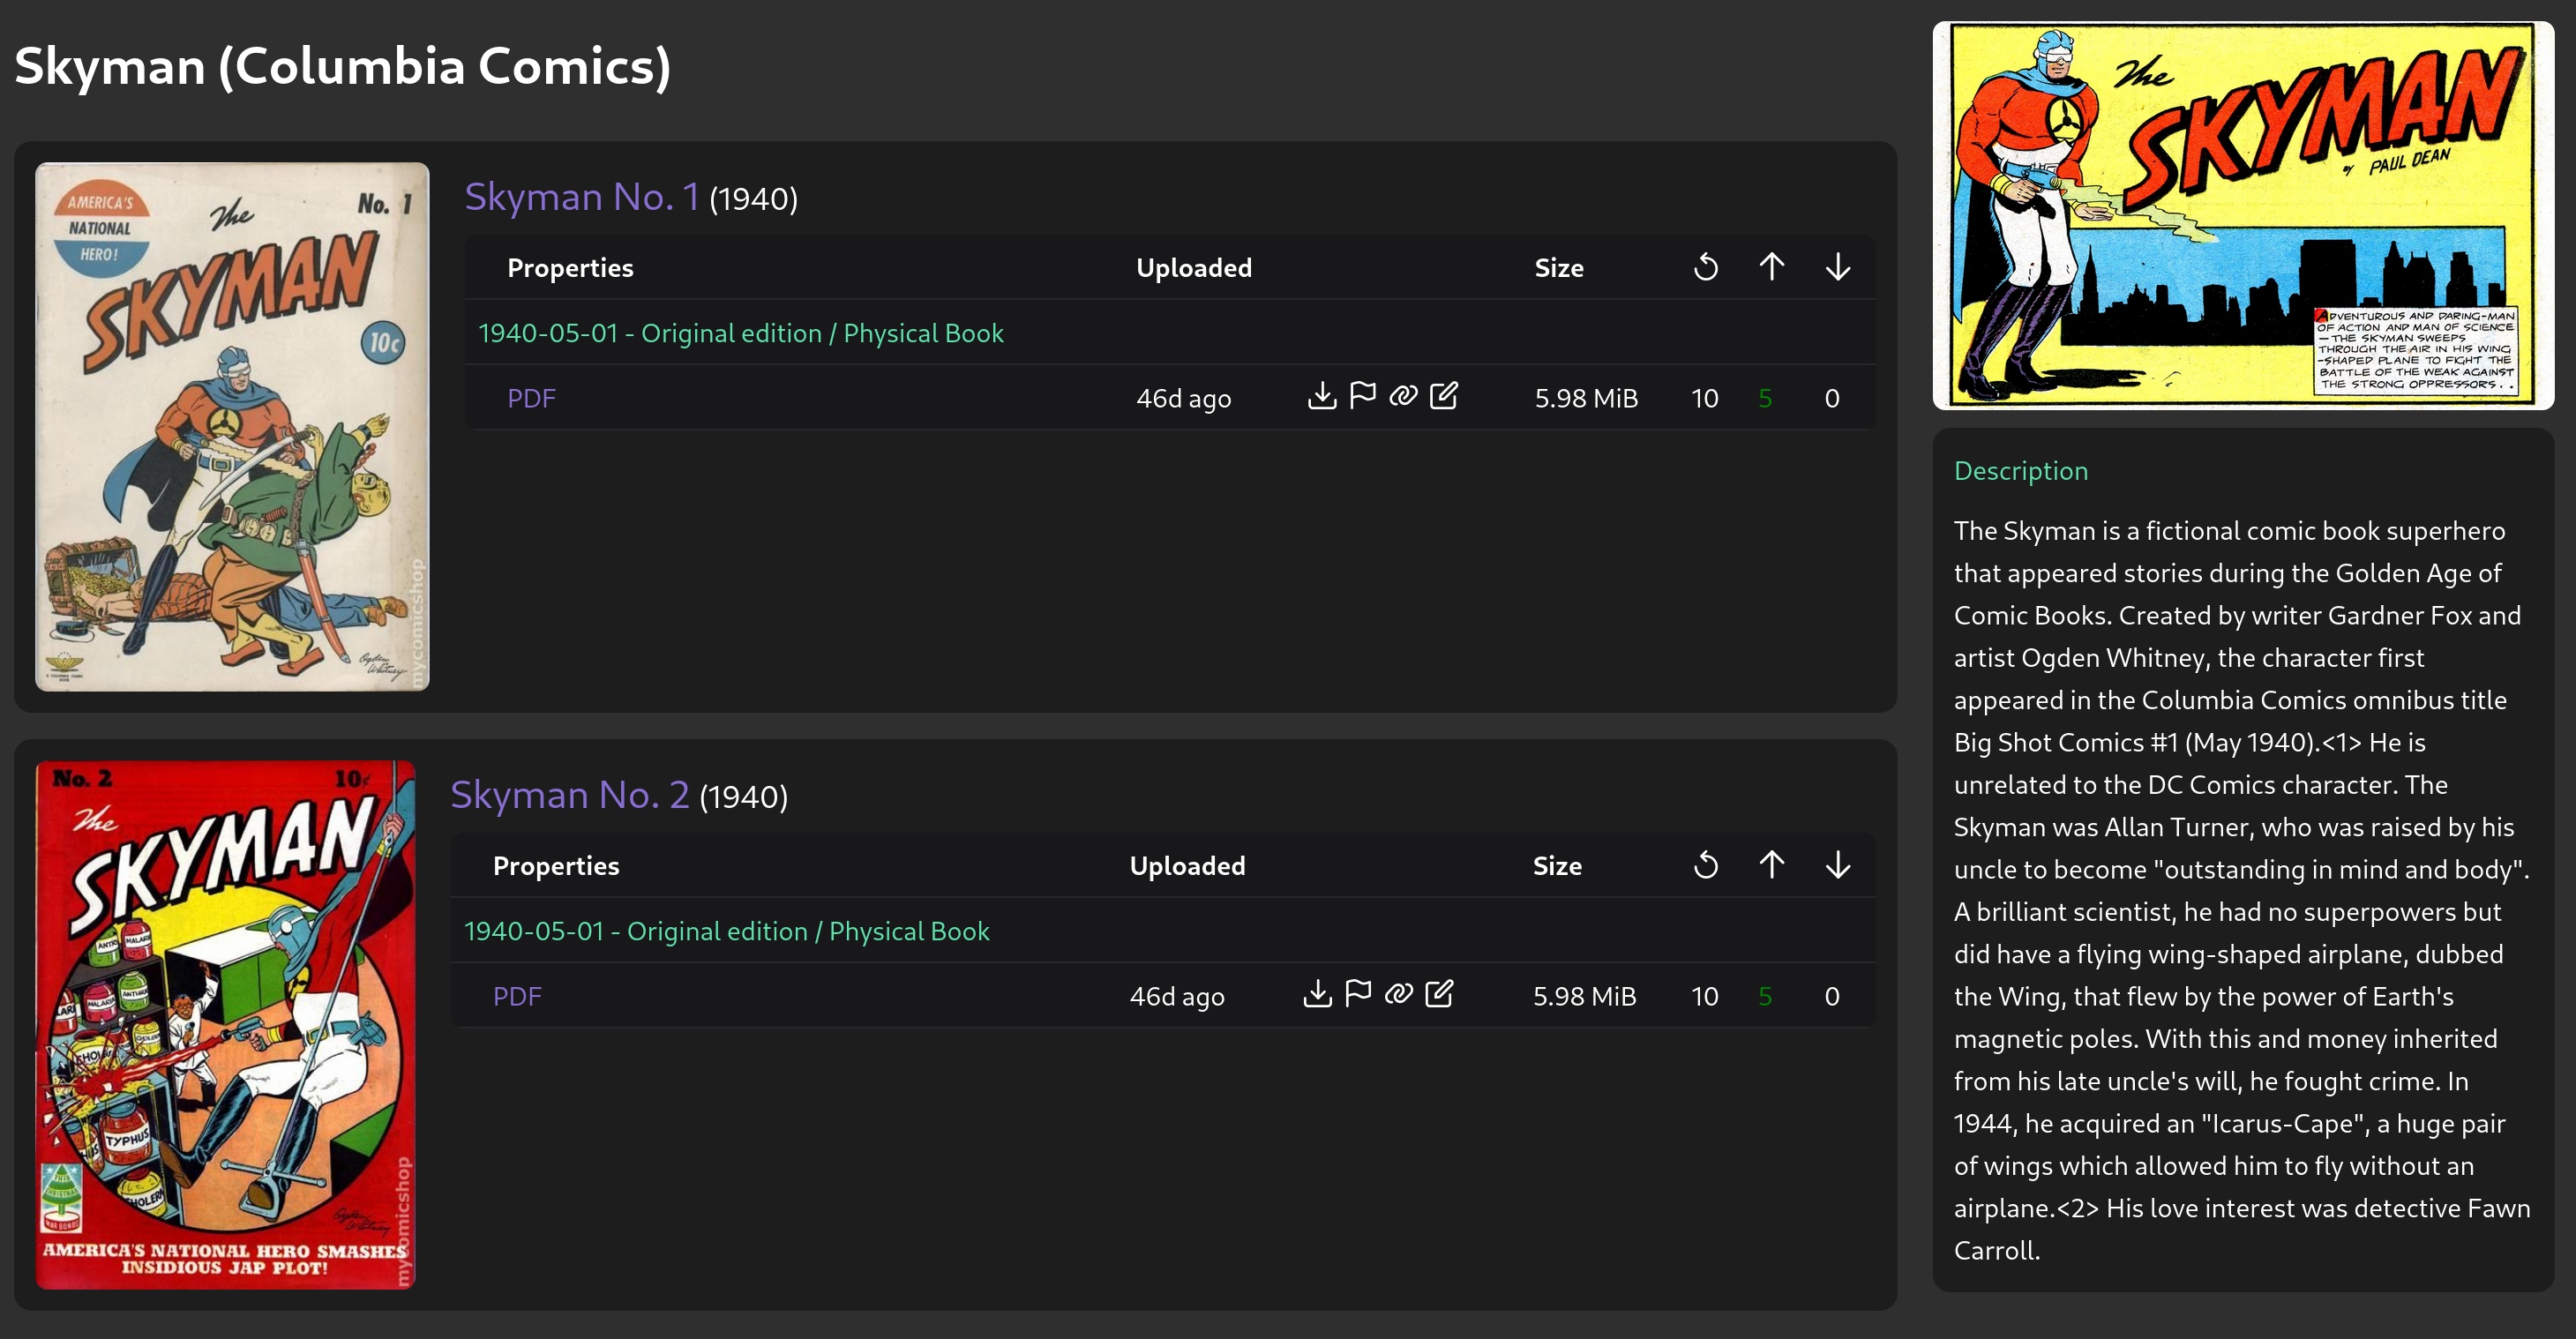
Book - Series view
Collections
Collections represent a “grouping” of content to avoid multiple uploads and reduce tracker load. Examples include site dumps, full/finished series, and monthly/yearly content groupings.
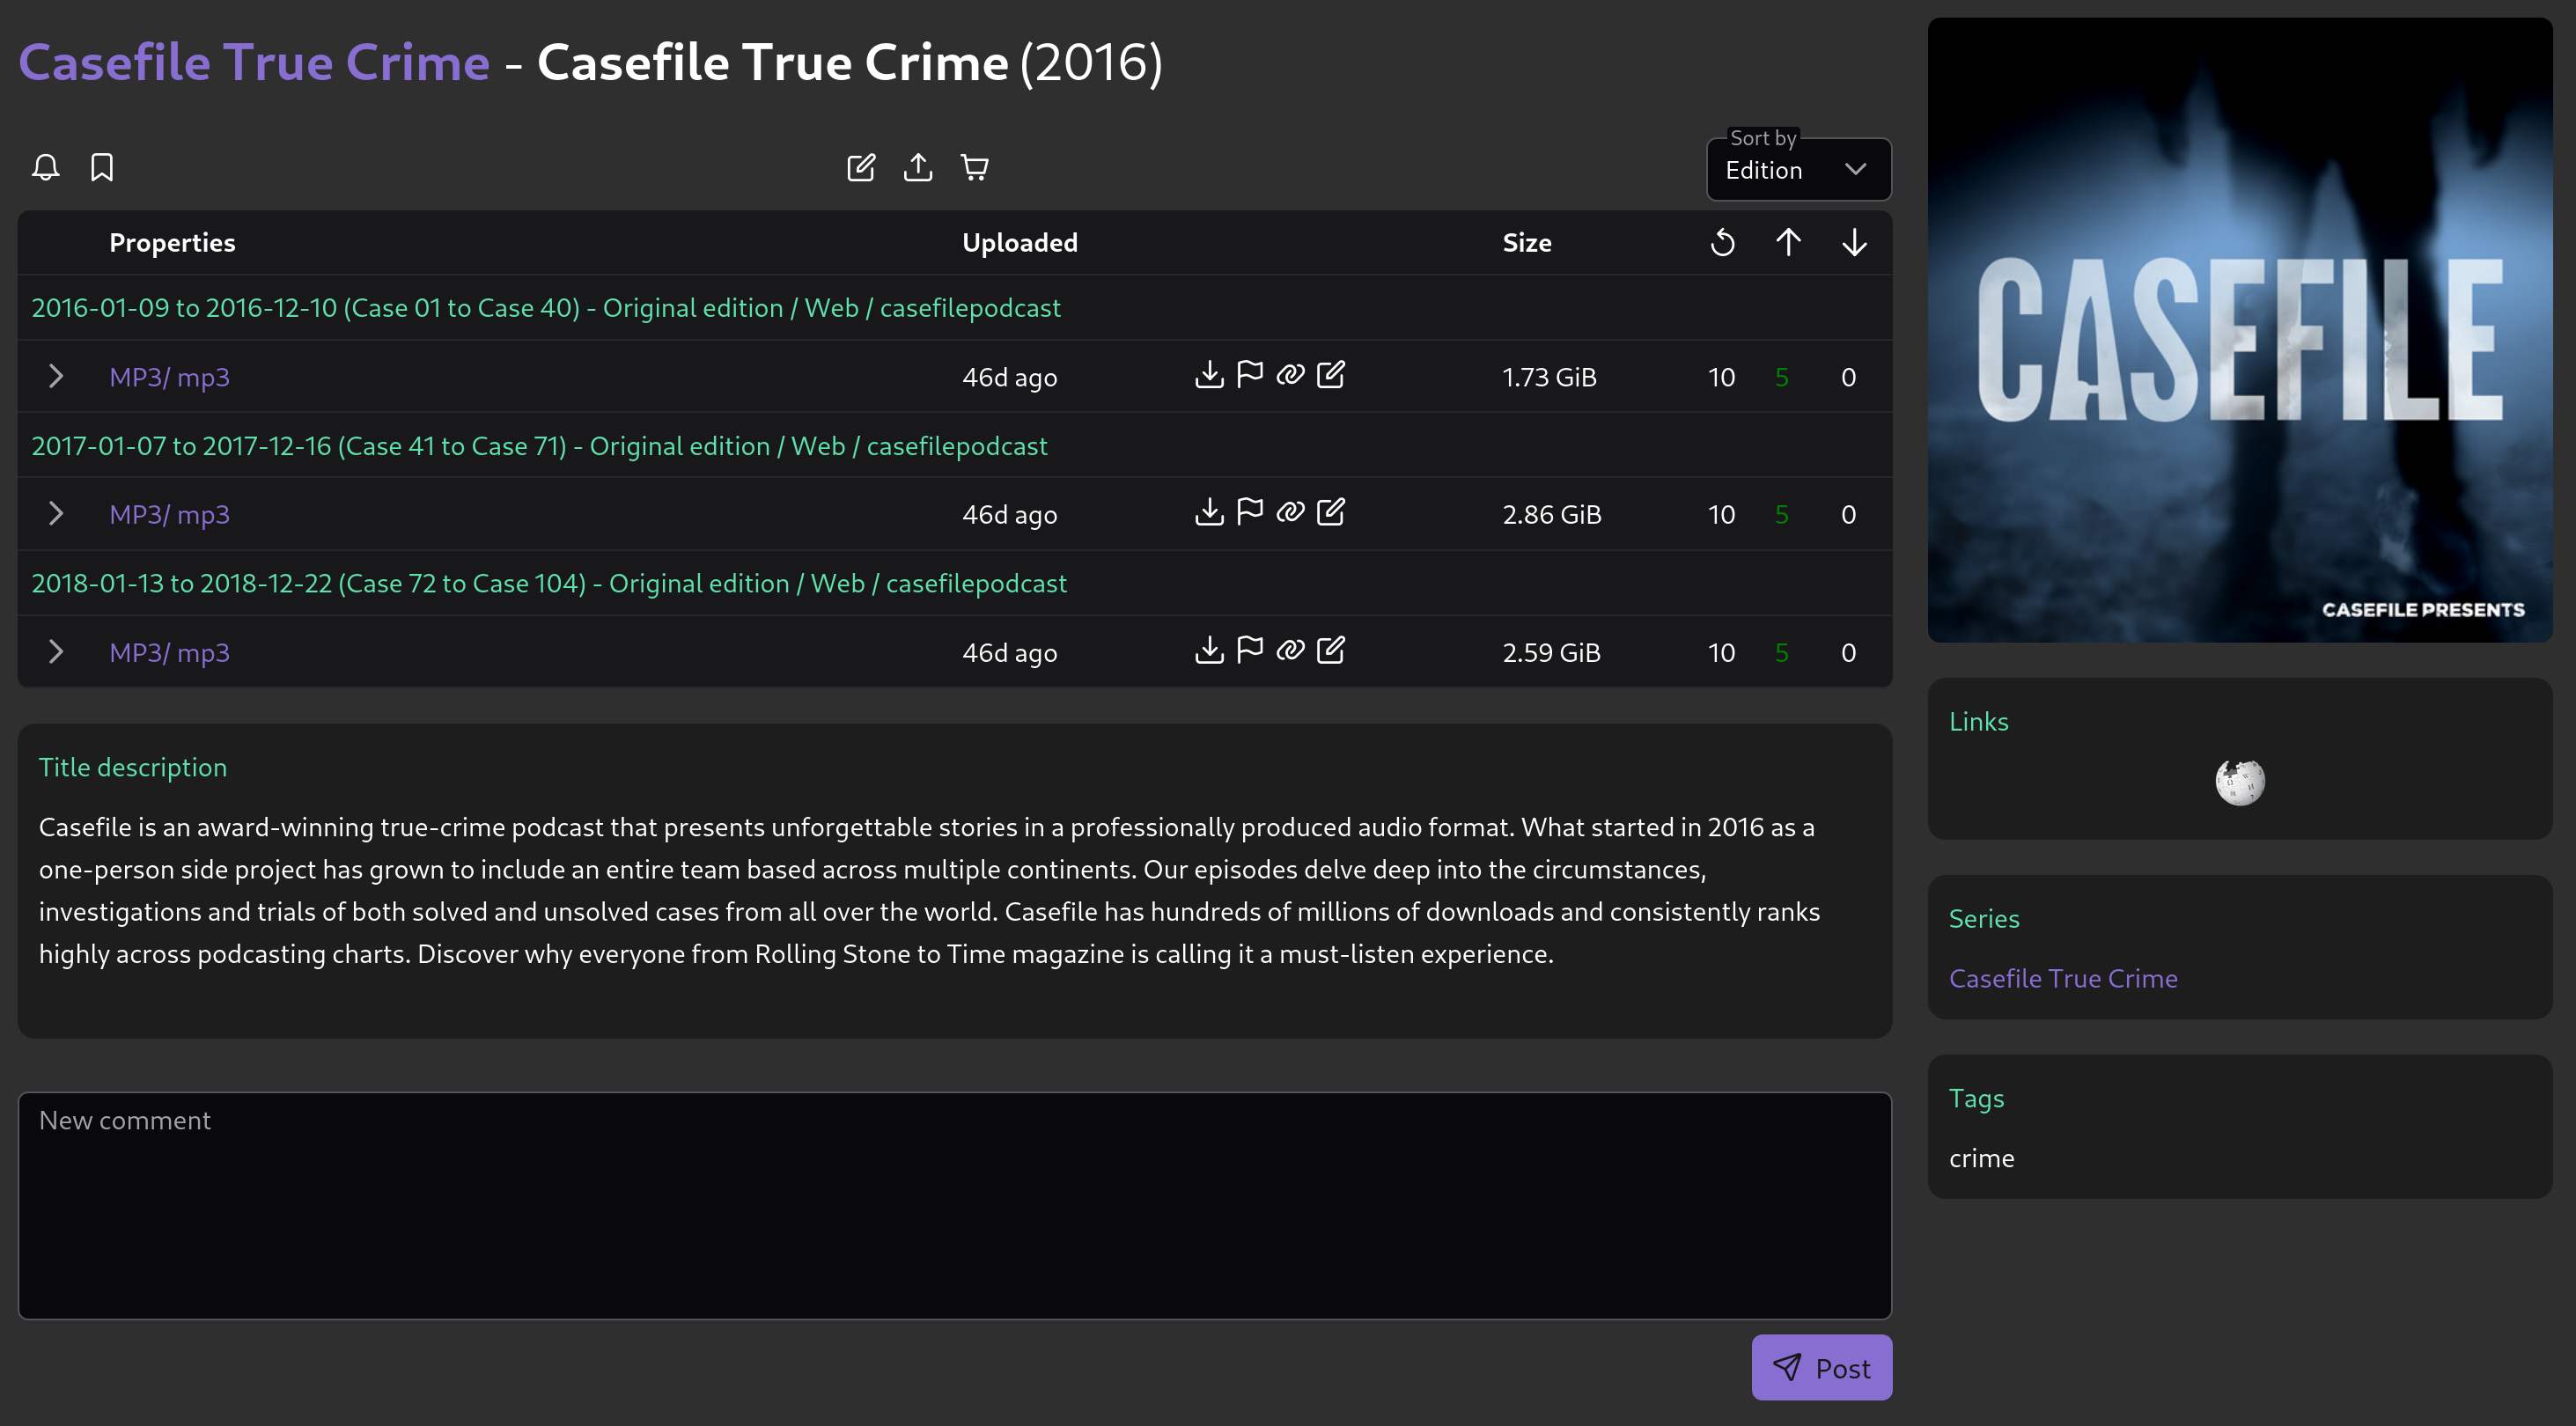
Podcast collection
Community
For contributions see CONTRIBUTING.md
Join our community:
- Discord: Join our server
Architecture
Overview
Arcadia is made of 2 main parts: the site’s API and a tracker. The site’s API is meant to be used by the frontend, while the tracker is meant to be used by torrent clients (qbittorrent, deluge, etc.).
Backend
Arcadia’s backend is a REST API written in rust with the actix framework and the sqlx database driver. It also uses PostgreSQL as its database.
Code Structure
API calls are forwarded to handlers, database requests are done by repositories, objects are defined by models. Directories with those names contain the relevant code.
A swagger for the API is available at http://localhost:8080/swagger-ui/
Frontend
Arcadia’s frontend is a SPA written in TypeScript and uses the Vue.js framework with PrimeVue components, Vite builds it.
API Schema Updates
If you make changes to structs that are listed in the swagger or the api routes, you must regenerate the typescript interfaces with this command (from the frontend directory, while the backend is running):
npx openapi-generator-cli generate -g typescript-axios -i http://127.0.0.1:8080/swagger-json/openapi.json -o ./src/services/api-schema -t .openapi-generator/templates --config .openapi-generator/openapi-generator.config.json --global-property=apiDocs=false,modelDocs=false,skipFormModel=false
Running Arcadia
There are two main ways to run Arcadia:
Environment Configuration
# Copy example environment files and edit them with the values you want
cp backend/api/.env.example backend/api/.env
cp backend/storage/.env.example backend/storage/.env
cp backend/periodic-tasks/.env.example backend/periodic-tasks/.env
cp frontend/.env.example frontend/.env
cp shared/.env.example shared/.env
cp tracker/arcadia_tracker/.env.example tracker/arcadia_tracker/.env
Other Customization
A few things need to be setup outside of the env variables.
Landing page
Arcadia allows you to display a custom landing page for not logged in users.
If VITE_ENABLE_CUSTOM_FRONT_PAGE is set to true in the frontend .env file, the file public/home/index.html will be served when visiting root url.
Assets
A few assets need to be setup.
frontend/src/assets/logo.svg: The logo of the site (displayed on the top left corner of the UI)frontend/public/favicon.ico: The favicon for the websitefrontend/public/default_user_avatar.png: The default avatar for users who didn’t set onefrontend/public/bonus_points_icon.png: The icon for bonus points
additional config files
Some of the services used with Arcadia need their own config files. kiwiirc and ergo are not required to run the rest of Arcadia
cp kiwiirc/config.json.example kiwiirc/config.json
cp ergo/ergo.motd.example ergo/ergo.motd
cp ergo/ergo-conf.yaml.example ergo/ergo-conf.yaml
Setup Methods
Standard Setup
Install dependencies directly on your system. See Standard Setup for detailed instructions.
Docker Setup
Use containerized deployment with Docker Compose. See Docker Setup for detailed instructions.
Standard Setup
This page explains how to install and run Arcadia directly on your system without Docker containers.
Prerequisites
Before starting, ensure you have the following installed:
- PostgreSQL - Database server
- Redis - Cache for the auth
- Rust & Cargo - Required to build the backend
- Node.js & npm - Required to build the frontend
- Git - To clone the repository
For development tool installation instructions, see the Developer Setup guide.
Quick Start
- Clone the repository and navigate to it
- Set up PostgreSQL database
- Set up Redis
- Configure and run the backend
- Configure and run the frontend
- Configure and run the tracker
Database Setup
1. Install PostgreSQL
Install PostgreSQL on your system:
Ubuntu/Debian:
sudo apt-get update
sudo apt-get install postgresql postgresql-contrib
macOS:
brew install postgresql
brew services start postgresql
Windows: Download and install from PostgreSQL official website.
2. Create Database and User
Connect to PostgreSQL and create the database:
# Connect as postgres user
sudo -u postgres psql

# Or on Windows/macOS:
psql -U postgres
In the PostgreSQL shell:
-- Create user
CREATE USER arcadia WITH PASSWORD 'your_secure_password';

-- Create database
CREATE DATABASE arcadia OWNER arcadia;

-- Grant privileges
GRANT ALL PRIVILEGES ON DATABASE arcadia TO arcadia;

-- Exit
\q
3. Run Database Migrations
Install the database migration tool and run migrations:
# Install sqlx-cli
cargo install sqlx-cli --no-default-features --features native-tls,postgres

# Navigate to storage directory
cd backend/storage

# Run migrations
sqlx migrate run --database-url postgresql://arcadia:your_secure_password@localhost:5432/arcadia
NOTE: if you get "Could not find directory of OpenSSL installation" error install
# Install openssl Ubuntu/Debian
sudo apt install pkg-config libssl-dev

# MacOS
brew install openssl@1.1

# Fedora
dnf install pkg-config openssl-devel
Redis setup
Backend Setup
Build and Run
Build and start the backend server:
cargo run --release
If you encounter build errors, install the required system dependencies:
Ubuntu/Debian:
sudo apt-get install libssl-dev openssl pkg-config
macOS:
xcode-select --install
Windows: Ensure you have Visual Studio Build Tools installed.
The backend will start and be accessible at http://localhost:8080.
Frontend Setup
Build and Run
Install dependencies and start the frontend:
npm install
npm run dev
The frontend will be accessible at http://localhost:5173 (or the port shown in the terminal).
Tracker Setup
Build and Run
Build and start the tracker server:
cargo run --release
Production Build
For production deployment:
Backend API
cd backend/api
cargo build --release

# Or from the root directory
cargo build -p arcadia-api --release

# The binary will be in target/release/arcadia-api
Tracker
cd tracker/arcadia_tracker
cargo build --release
Frontend
cd frontend
npm run build
# Built files will be in the dist/ directory
Troubleshooting
Database Issues
PostgreSQL not running:
# Ubuntu/Debian
sudo systemctl start postgresql
sudo systemctl enable postgresql

# macOS
brew services start postgresql
Connection errors:
- Verify PostgreSQL is running on port 5432
- Check that the database and user exist
- Ensure the DATABASE_URL in
.envis correct
Build Issues
Backend API build fails:
- Install system dependencies listed above
- Update Rust:
rustup update - Clear build cache:
cargo clean
Frontend build fails:
- Check Node.js version compatibility
- Clear npm cache:
npm cache clean --force - Delete
node_modulesand runnpm installagain
Runtime Issues
Backend API won’t start:
- Check the database connection
- Verify environment variables in
.env - Ensure migrations have been run
Frontend can’t connect to backend API:
- Verify the backend is running on the correct port
- Check
VITE_API_URLinfrontend/.env
Stopping Arcadia
To stop Arcadia:
- Stop the frontend with
Ctrl+Cin its terminal - Stop the tracker with
Ctrl+Cin its terminal and wait for its graceful shutdown - Stop the backend API with
Ctrl+Cin its terminal - Optionally stop PostgreSQL if you don’t need it for other applications
Docker Setup
This guide will help you get Arcadia running quickly using Docker Compose.
Prerequisites
- Docker and Docker Compose installed
- Git (to clone the repository)
If running docker compose doesn’t work, you may have an older version of the docker cli installed and may need to use docker-compose instead.
Also don’t forget to use sudo if you aren’t in the docker group!
Quick Setup
- Env variable specifications:
Make sure that all environment variables with urls have the correct host and port to the correct container.
For example, in any variable named DATABASE_URL, replace localhost with db.
In any variable named ARCADIA_API_BASE_URL, replace localhost with backend, etc.
In
backend/api/.env, the variableACTIX_HOSTmust be set to0.0.0.0instead of127.0.0.1because the backend won’t listen on the Docker virtual interface otherwise.
In
frontend/.env, setVITE_API_BASE_URLtohttp://127.0.0.1:5173. CORS in the browser won’t allow requests to a different host or port from within the frontend file server. The filefrontend/docker/nginx.confforwardsapirequests to thebackendcontainer.
-
Start all services:
docker compose --env-file backend/api/.env up -dNote: the
--env-fileoption is necessary as it will make theREDIS_PASSWORDenvironment variable available before the container is ran (and not only for the container itself, it is not the same as the compose attributeenv_file).This command will:
- Build the backend and frontend images
- Start PostgreSQL database
- Run database migrations automatically
- Start the backend API server
- Start the frontend development server
-
Access the application:
- Frontend:
http://localhost:5173 - Backend API:
http://localhost:8080/api/
- Frontend:
Individual Service Management
If you prefer to start services individually:
Database Only
docker compose up db -d
Redis Only
docker compose --env-file backend/api/.env up redis -d
Backend Api Only
docker compose up backend -d
Frontend Only
docker compose up frontend -d
Development Features
Auto-rebuild with Compose Watch
For development, you can use Compose Watch to automatically rebuild when source code changes:
docker compose up --watch
Or when running attached (without -d), press W to enable watch mode.
Adding Test Data
You can optionally add “fake” data (fixtures) to the database for development:
docker exec -i arcadia_db psql -U arcadia -d arcadia < backend/storage/migrations/fixtures/fixtures.sql
The default test user is picolo with password test.
Exporting Test Data
If you added some new test data and wish to include it in your commit, you can export it like so:
docker exec -i arcadia_db pg_dump -U arcadia -d arcadia --data-only --inserts --column-inserts > backend/storage/migrations/fixtures/fixtures.sql && sed -i '/SELECT pg_catalog.set_config(\x27search_path\x27, \x27\x27, false);/d' migrations/fixtures/fixtures.sql
1 line generated by pgdump must be removed as it prevents the collage_entry fixtures from being inserted (the trigger somehow can’t be interprted). If someone has an explanation, please let us know/open a PR!
Manual Database Setup (if needed)
Arcadia automatically runs migrations on launch, but if you need to manually set up the database:
cargo install sqlx-cli
cargo sqlx database setup
Troubleshooting
- If services fail to start, check logs with:
docker compose logs [service-name] - To rebuild images:
docker compose build - To reset everything:
docker compose down -v && docker compose up -d
Developer Setup
Development Containers (Optional)
If you don’t want to install another toolchain on your system, You can also use devcontainers instead. If you don’t know, think of isolated minimal virtual machines that come with the tools required to build Arcadia (or anything else really).
If you have Docker (recommended!) installed and use Visual Studio Code, all you need is to have the Dev Containers extension installed and “reopening your folder in a container”. You can find that option in your Command Palette, or by clicking on the new status bar item in the left bottom corner.
You can also use GitHub Codespaces to build Arcadia in the cloud without having to download anything but streams of text, although it’s not as free as a local dev container.
![]()
It isn’t required to use them but can be useful in some cases (especially if you’re using an immutable OS).
Required Tools
You need these to make meaningful contributions to Arcadia, outside the cases of documentation for example.
- Node.js & npm
- Cargo (version 1.88.0 and higher)
Recommended Tools
- Prettier for proper formatting of the frontend’s code.
- sqlx-cli for managing database related stuff, including migrations.
- Docker for setting up dependencies. Optional but HIGHLY recommended!
- Insomnia for testing the backend’s API. You could also use any other client if you want.
Environment Setup
Backend
At build time, Arcadia’s backend will source environment variables to influence its behavior. Documented sample files are made available, so a quick way to get started is to use it by running cp .env.example .env (in the folders api, periodic-tasks and storage).
Frontend
At runtime, the frontend will be hardcoded with the site’s API location sourced from an enviroment variable. The simplest way to set these during development is to write them into a file named .env. A documented sample file is made available, so a quick way to get started is to use it by running cp .env.example .env.
Building and Running
API
# Build the backend
cargo build -p arcadia-api

# Run the backend binary
./target/debug/arcadia-api

# For optimized builds
cargo build -p arcadia-api --release
./target/release/arcadia-api
Frontend
# Install dependencies
npm install

# Build and run development server
npm run dev

# For production build
npm run build
Development Workflow
Backend Development
# For development with auto-rebuild on changes
cd backend/api
cargo run

# Build and test
cargo build -p arcadia-api
cargo test

# Code quality checks
cargo clippy --fix --allow-dirty
cargo fmt --all
Frontend Development
cd frontend

# Development server with hot reload
npm run dev

# Run tests
npm run test:unit

# Lint and format
npm run lint
npm run format
Backup
This page explains how to create backups of your Arcadia installation, including the database and configuration files.
For all the possible flags and operations, check the --help flag:
./backup.sh --help
Overview
The backup process includes:
- Complete database dump (schema + data)
- Environment configuration files (
.envfiles) - Backup metadata and timestamps
Prerequisites
ziputility installed on your system- For local setup: PostgreSQL client tools (
pg_dump)
Quick Backup
For Docker setup:
./backup.sh --db-docker
For local/standard setup:
./backup.sh
Backup Script Options
The backup script supports both Docker and local PostgreSQL setups with various configuration options.
Docker Mode
Use --db-docker flag to backup from a containerized database:
# Default Docker backup
./backup.sh --db-docker

# Custom container name
./backup.sh --db-docker --db-container my_custom_db
Docker mode options:
--db-container: Docker container name (default:arcadia_db)
Local Mode
For standard installations with local PostgreSQL:
# Default local backup
./backup.sh

# Remote database
./backup.sh --db-host db.example.com --db-user myuser

# With password
./backup.sh --db-password mypassword
Local mode options:
--db-host: Database host (default:localhost)--db-port: Database port (default:5432)--db-name: Database name (default:arcadia)--db-user: Database user (default:arcadia)--db-password: Database password (optional)
Configuration Priority
The script loads configuration in this order (highest to lowest priority):
- Command line arguments - Override everything
- Environment variables from
.envfiles:- Docker mode:
backend/api/.env.docker→backend/api/.env - Local mode:
backend/api/.env
- Docker mode:
- Built-in defaults
What Gets Backed Up
Database
- Complete PostgreSQL dump using
pg_dump - Includes all schema and data
- Uses
--no-owner --no-privilegesfor portability
Configuration Files
backend/api/.env→backend.envfrontend/.env→frontend.env
Metadata
- Backup timestamp
- Database information
- Setup type (Docker/Local)
- Backup configuration details
Backup Output
The script creates:
- Temporary backup directory:
backup_YYYYMMDD_HHMMSS/ - Final zip archive:
arcadia_backup_YYYYMMDD_HHMMSS.zip
Example backup contents:
arcadia_backup_20241201_143022.zip
├── database_full.sql
├── backend.env
├── frontend.env
└── backup_info.txt
Testing
Backend Testing
Adding additional tests to Arcadia is strongly encouraged, especially when adding new features! For unit tests, they can be added in the module being tested using standard rust idioms.
End-to-end tests can also be authored, they should be located in tests/ and use the sqlx test fixture machinery to populate the database for testing. See tests/test_auth.rs for examples.
Frontend Testing
We don’t have any tests for the frontend. We’ll add them once it’s more “production ready”.
Cached counts
Multiple DB attributes act as “cached SQL COUNTs” that are automatically updated when needed. However, if they are out of sync for whatever reason (manual db edits for example), they can be manually updated with those queries:
-- Update artists.title_groups_amount
UPDATE artists
SET title_groups_amount = (
    SELECT COUNT(DISTINCT title_group_id)
    FROM affiliated_artists
    WHERE affiliated_artists.artist_id = artists.id
);
-- Update artists.edition_groups_amount
UPDATE artists
SET edition_groups_amount = (
    SELECT COUNT(DISTINCT eg.id)
    FROM edition_groups eg
    WHERE eg.title_group_id IN (
        SELECT DISTINCT title_group_id
        FROM affiliated_artists
        WHERE affiliated_artists.artist_id = artists.id
    )
);
-- Update artists.torrents_amount
UPDATE artists
SET torrents_amount = (
    SELECT COUNT(DISTINCT t.id)
    FROM torrents t
    JOIN edition_groups eg ON t.edition_group_id = eg.id
    WHERE eg.title_group_id IN (
        SELECT DISTINCT title_group_id
        FROM affiliated_artists
        WHERE affiliated_artists.artist_id = artists.id
    )
);
-- Update users.forum_posts
UPDATE users
SET forum_posts = (
    SELECT COUNT(*)
    FROM forum_posts
    WHERE forum_posts.created_by_id = users.id
);
-- Update users.forum_threads
UPDATE users
SET forum_threads = (
    SELECT COUNT(*)
    FROM forum_threads
    WHERE forum_threads.created_by_id = users.id
);
-- Update users.torrent_comments
UPDATE users
SET torrent_comments = (
    SELECT COUNT(*)
    FROM title_group_comments
    WHERE title_group_comments.created_by_id = users.id
);
-- Update users.requests_voted
UPDATE users
SET requests_voted = (
    SELECT COUNT(DISTINCT torrent_request_id)
    FROM torrent_request_votes
    WHERE torrent_request_votes.created_by_id = users.id
);
-- Update users.requests_filled
UPDATE users
SET requests_filled = (
    SELECT COUNT(*)
    FROM torrent_requests
    WHERE torrent_requests.filled_by_user_id = users.id
);
-- Update users.collages_started
UPDATE users
SET collages_started = (
    SELECT COUNT(*)
    FROM collage
    WHERE collage.created_by_id = users.id
);
-- Update users.title_groups
UPDATE users
SET title_groups = (
    SELECT COUNT(*)
    FROM title_groups
    WHERE title_groups.created_by_id = users.id
);
-- Update users.edition_groups
UPDATE users
SET edition_groups = (
    SELECT COUNT(*)
    FROM edition_groups
    WHERE edition_groups.created_by_id = users.id
);
-- Update users.torrents
UPDATE users
SET torrents = (
    SELECT COUNT(*)
    FROM torrents
    WHERE torrents.created_by_id = users.id
);
-- Update users.invited
UPDATE users
SET invited = (
    SELECT COUNT(*)
    FROM invitations
    WHERE invitations.sender_id = users.id
      AND invitations.receiver_id IS NOT NULL
);
-- Update artists.seeders_amount, artists.leechers_amount and artists.snatches_amount
UPDATE artists
SET seeders_amount = COALESCE((
        SELECT SUM(t.seeders)
        FROM torrents t
        JOIN edition_groups eg ON t.edition_group_id = eg.id
        JOIN affiliated_artists aa ON aa.title_group_id = eg.title_group_id
        WHERE aa.artist_id = artists.id
          AND t.deleted_at IS NULL
    ), 0),
    leechers_amount = COALESCE((
        SELECT SUM(t.leechers)
        FROM torrents t
        JOIN edition_groups eg ON t.edition_group_id = eg.id
        JOIN affiliated_artists aa ON aa.title_group_id = eg.title_group_id
        WHERE aa.artist_id = artists.id
          AND t.deleted_at IS NULL
    ), 0),
    snatches_amount = COALESCE((
        SELECT SUM(t.times_completed)
        FROM torrents t
        JOIN edition_groups eg ON t.edition_group_id = eg.id
        JOIN affiliated_artists aa ON aa.title_group_id = eg.title_group_id
        WHERE aa.artist_id = artists.id
          AND t.deleted_at IS NULL
    ), 0);
-- Update torrents.seeders and torrents.leechers
UPDATE torrents
SET
    seeders = (
        SELECT COUNT(*)
        FROM peers
        WHERE peers.torrent_id = torrents.id
          AND peers.seeder = true
          AND peers.active = true
    ),
    leechers = (
        SELECT COUNT(*)
        FROM peers
        WHERE peers.torrent_id = torrents.id
          AND peers.seeder = false
          AND peers.active = true
    );
Contributing
First, thanks for considering contributing to Arcadia!
Contributing Process
Whether you want to add a new feature or fix an existing issue, it needs to be done on your own branch:
- Fork this repository
- Clone it locally on your computer
- create a new branch
feature-nameorbug-name-fix(with the proper name) - open a pull request when your contribution is done
If you are unsure about what/how to do something, don’t hesitate to open a discussion or an issue about the topic.
You can also hop on the Discord server to chat with other devs and the community.
Finding Contributions to Make
Arcadia has boards to track the existing issues and features that need to be worked on. Feel free to claim one that isn’t claimed yet before starting to work on it.
To claim a github issue, simply leave a comment on it saying that you are working on it.
You can also search for TODOs in the code and pick one of those tasks. If you decide to do this, please open an issue first and claim it before working on the task.
Backend Development Notes
-
If you make changes to/add sql queries with
sqlx, you need to runcargo sqlx prepareinside thebackend/storagefolder before committing your changes. This command will generate some files that allow the queries to be tested without a database running. Our CI pipeline relies on that, and will fail if the command hasn’t been ran. You can setup a git pre-commit hook if you want. -
For better code quality, we use clippy in our CI pipeline. You can set your editor to run
cargo clippyinstead ofcargo check(on file save, etc.).
Legal Notice
This tool (Arcadia) is intended for legal use only. Users (both the ones hosting Arcadia and the ones using it) are solely responsible for the content they download and share through it. Downloading or distributing copyrighted material without proper authorization is illegal in most jurisdictions. By hosting and/or using Arcadia, you agree to abide by all applicable laws and respect intellectual property rights. The developers of Arcadia assume no responsibility for any illegal activities conducted by its hosters and users.